eGrow supports two ways to connect WhatsApp:
1. Coexistence (scan a QR code and keep the WhatsApp Business app). This method is official and completely legal. However, it comes with the app's own limits and known troubles — WhatsApp may block sending when you message many customers, campaigns are restricted, and disconnections are more frequent.
2. Recommended — a dedicated number without the WhatsApp app. Connect a number that is NOT installed in any WhatsApp app directly to eGrow, and answer & receive all messages from eGrow Web and the eGrow mobile app. This is the most stable method for automations, campaigns and high message volumes, and it is what we always advise.
eGrow is an official Meta partner and uses the WhatsApp Business Cloud API to help you automate and manage WhatsApp messaging at scale.
Important Notes Before You Start
Once a phone number is connected to WhatsApp via eGrow, it cannot be used on the regular WhatsApp or WhatsApp Business mobile app.
If the number is currently active on any WhatsApp app, you must delete the WhatsApp account from the app first before starting the connection.
This guide explains how to securely connect your WhatsApp Business number to eGrow V2 using Meta’s official onboarding process.
Step-by-Step: Connect WhatsApp to eGrow V2
1. Open WhatsApp Integration in eGrow
Log in to your eGrow V2 account
Navigate to Integrations
Locate WhatsApp
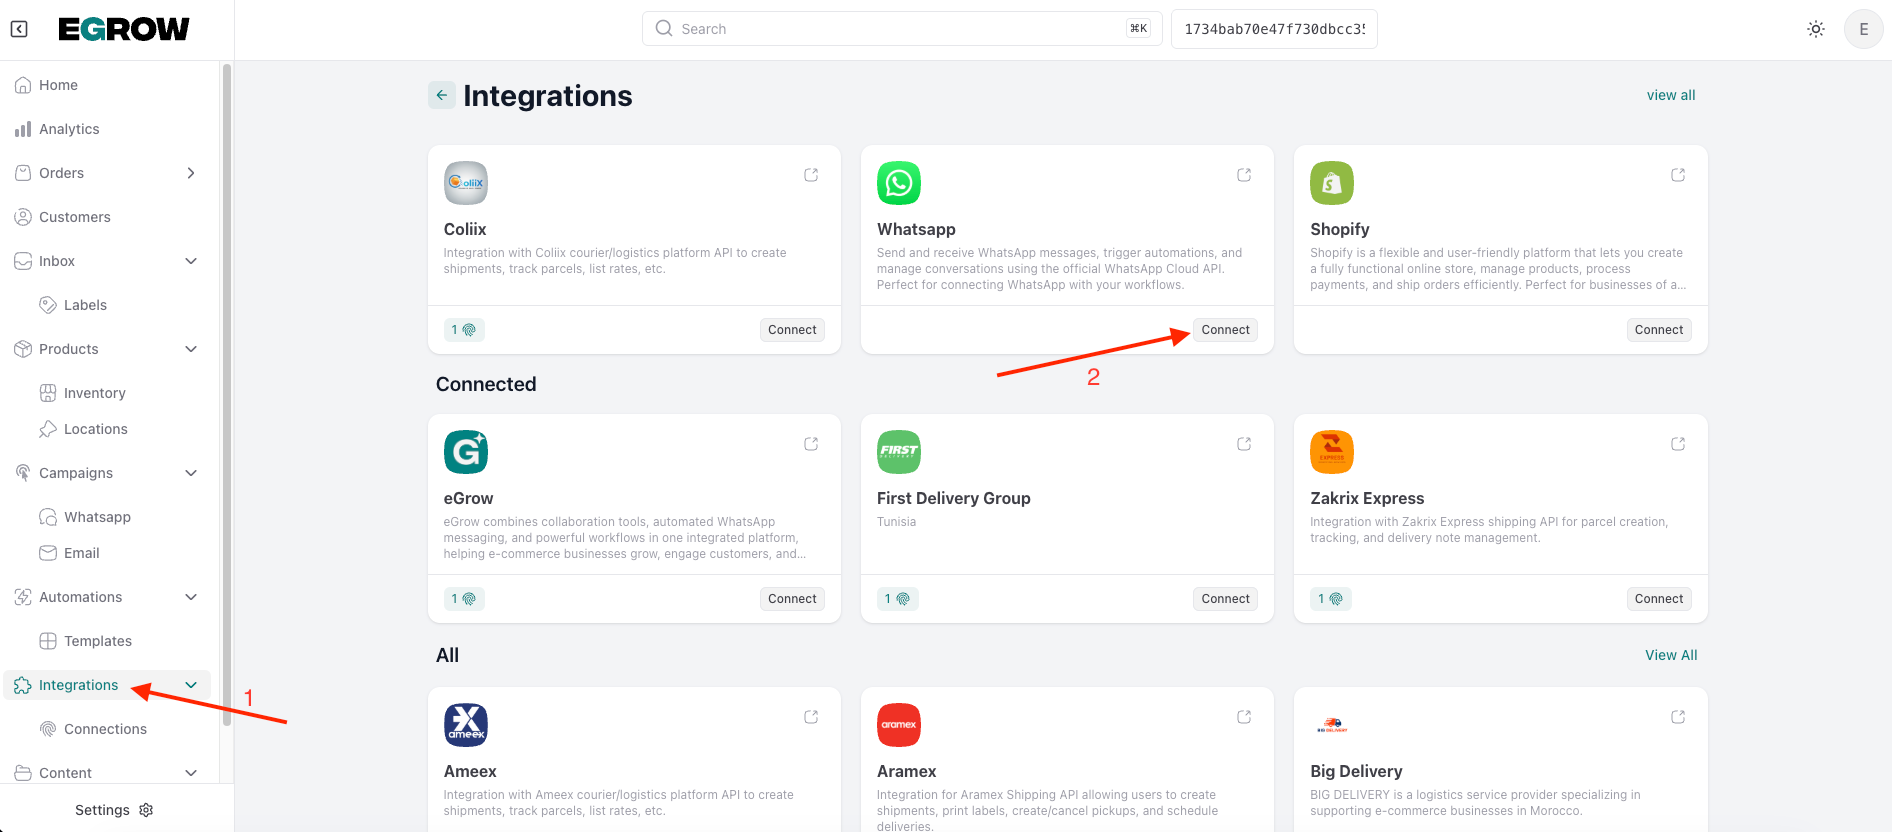
Click Connect
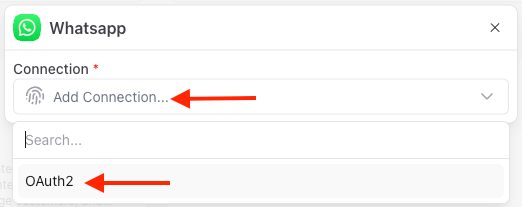
Click Add Connection
2. Choose Connection Type
From the connection type dropdown, select OAuth2
Click Continue with WhatsApp
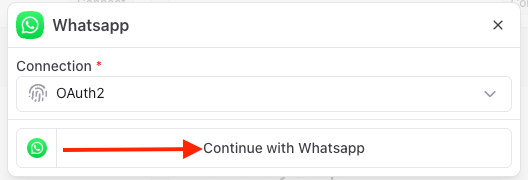
A Meta (Facebook) authorization popup will open.
3. Log in with Your Facebook Account
Sign in using the Facebook account that manages your Meta Business Manager
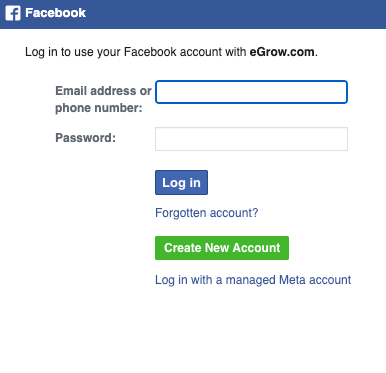
Approve access for the eGrow Facebook App
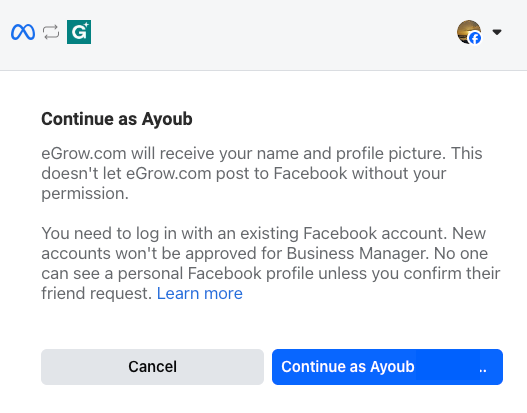
Keep all permission toggles enabled
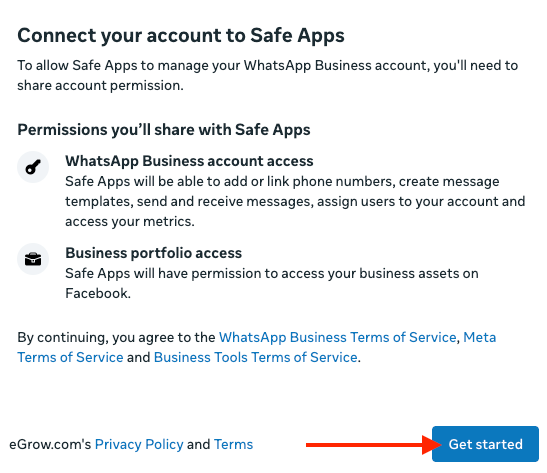
This allows eGrow to:
Create and manage your WhatsApp Business API setup
Link and verify your phone number
Send WhatsApp messages on your behalf
4. Select Your Meta Business Manager
Choose an existing Meta Business Manager, or create a new one
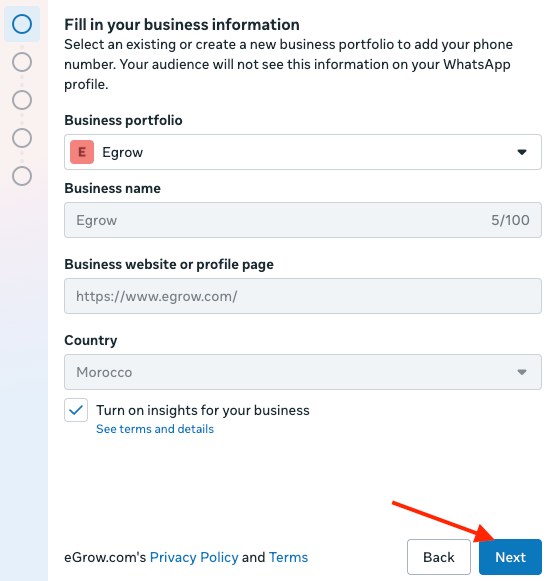
Only Business Manager admins can proceed
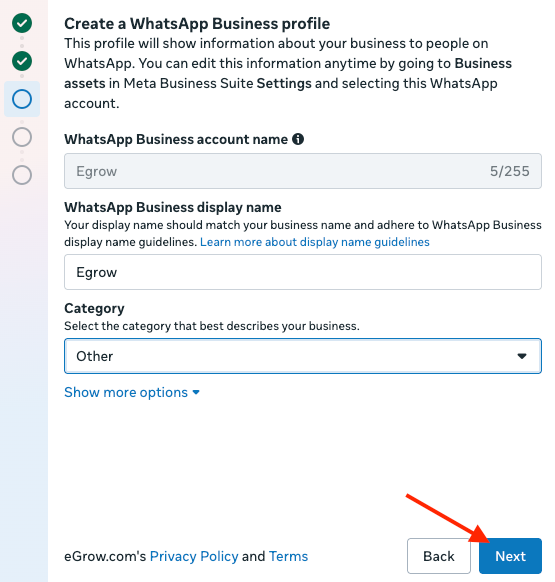
5. Set Up Your WhatsApp Business Profile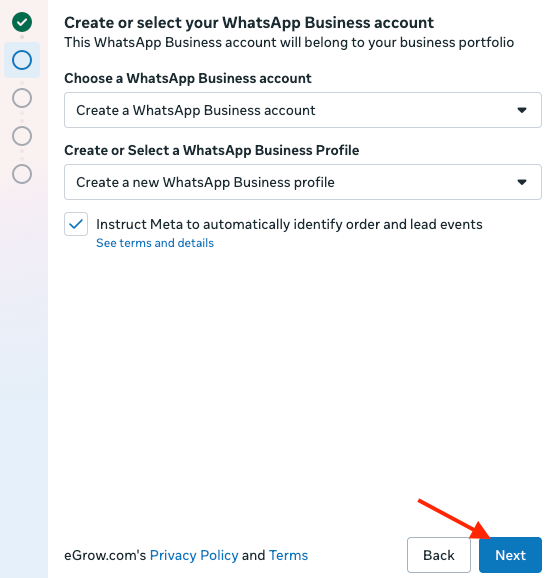
Enter your WhatsApp Business display name (visible to customers)
Choose a business category
6. Add and Verify Your Phone Number
Enter the phone number you want to use with WhatsApp API
Ensure the number is not active on WhatsApp or WhatsApp Business mobile apps
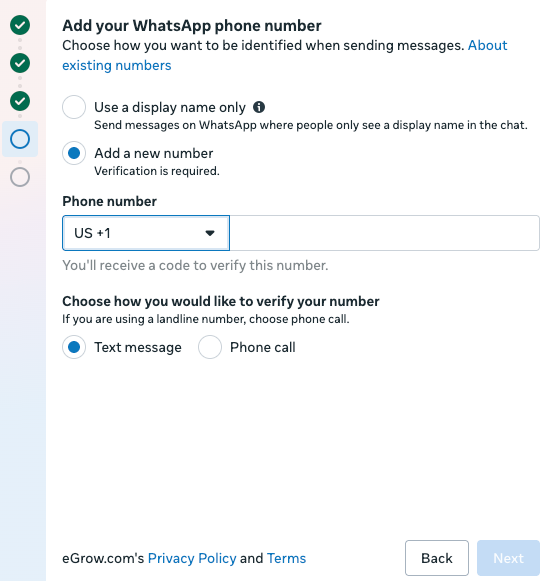
Choose how to receive the verification code:
SMS
Phone call
Enter the 6-digit verification code to continue
After verification, Meta will complete the onboarding process.
Click Finish on the final confirmation screen.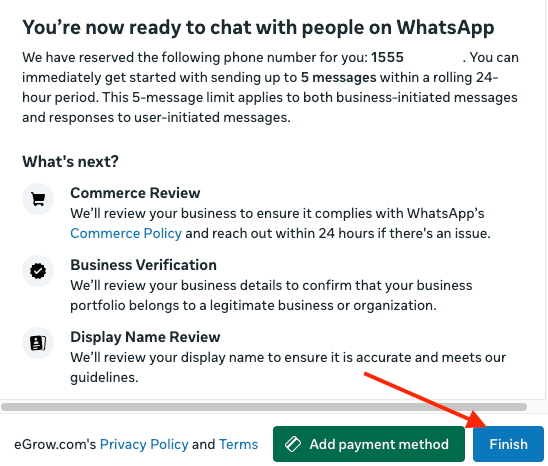
7. Authenticate the WhatsApp Connection in eGrow
Once Meta onboarding is complete, you’ll return to eGrow where the WhatsApp connection details will be displayed: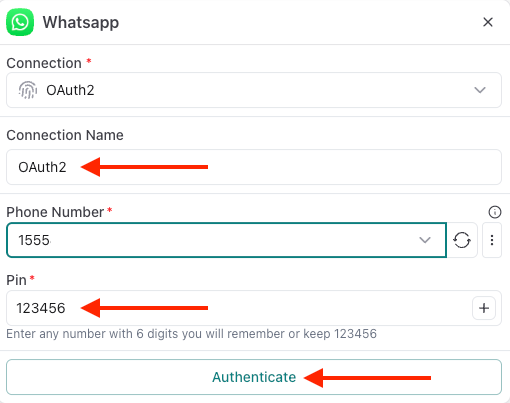
Connection Type
Connection Name (editable)
Phone Number
PIN
👉 Enter or confirm the 6-digit PIN
👉 Click Authenticate
Success Confirmation
A success message will appear confirming that your WhatsApp integration has been successfully connected in eGrow V2.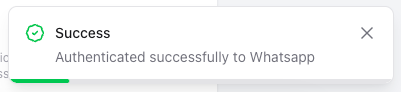
Your WhatsApp number is now ready to be used inside eGrow.
After Setup: Start Messaging
Once connected, you can:
Create WhatsApp message templates
Send automated messages (order updates, confirmations, follow-ups)
Broadcast messages to customers
Track delivery status and customer replies
Trigger workflows based on WhatsApp interactions