Step 1: Go to WhatsApp Campaigns
From the left sidebar, click Campaigns
Select WhatsApp
Click Create Campaign
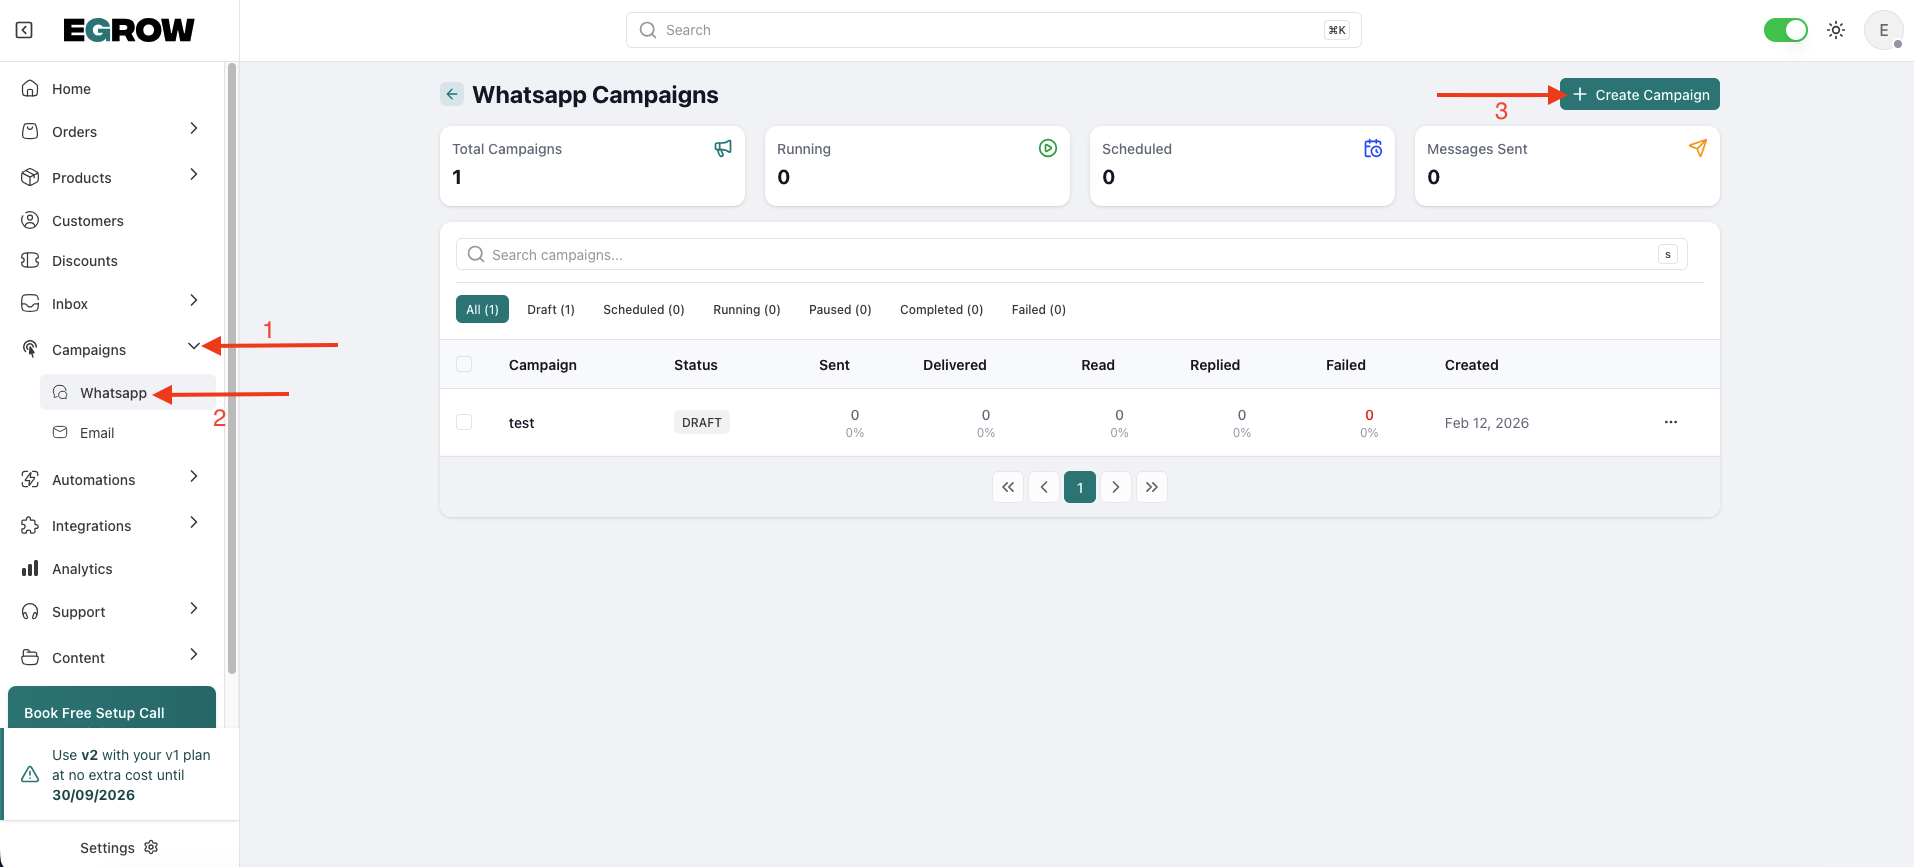
You will be redirected to the new Create WhatsApp Campaign page.
Step 2: Fill Campaign Details
At the top of the page: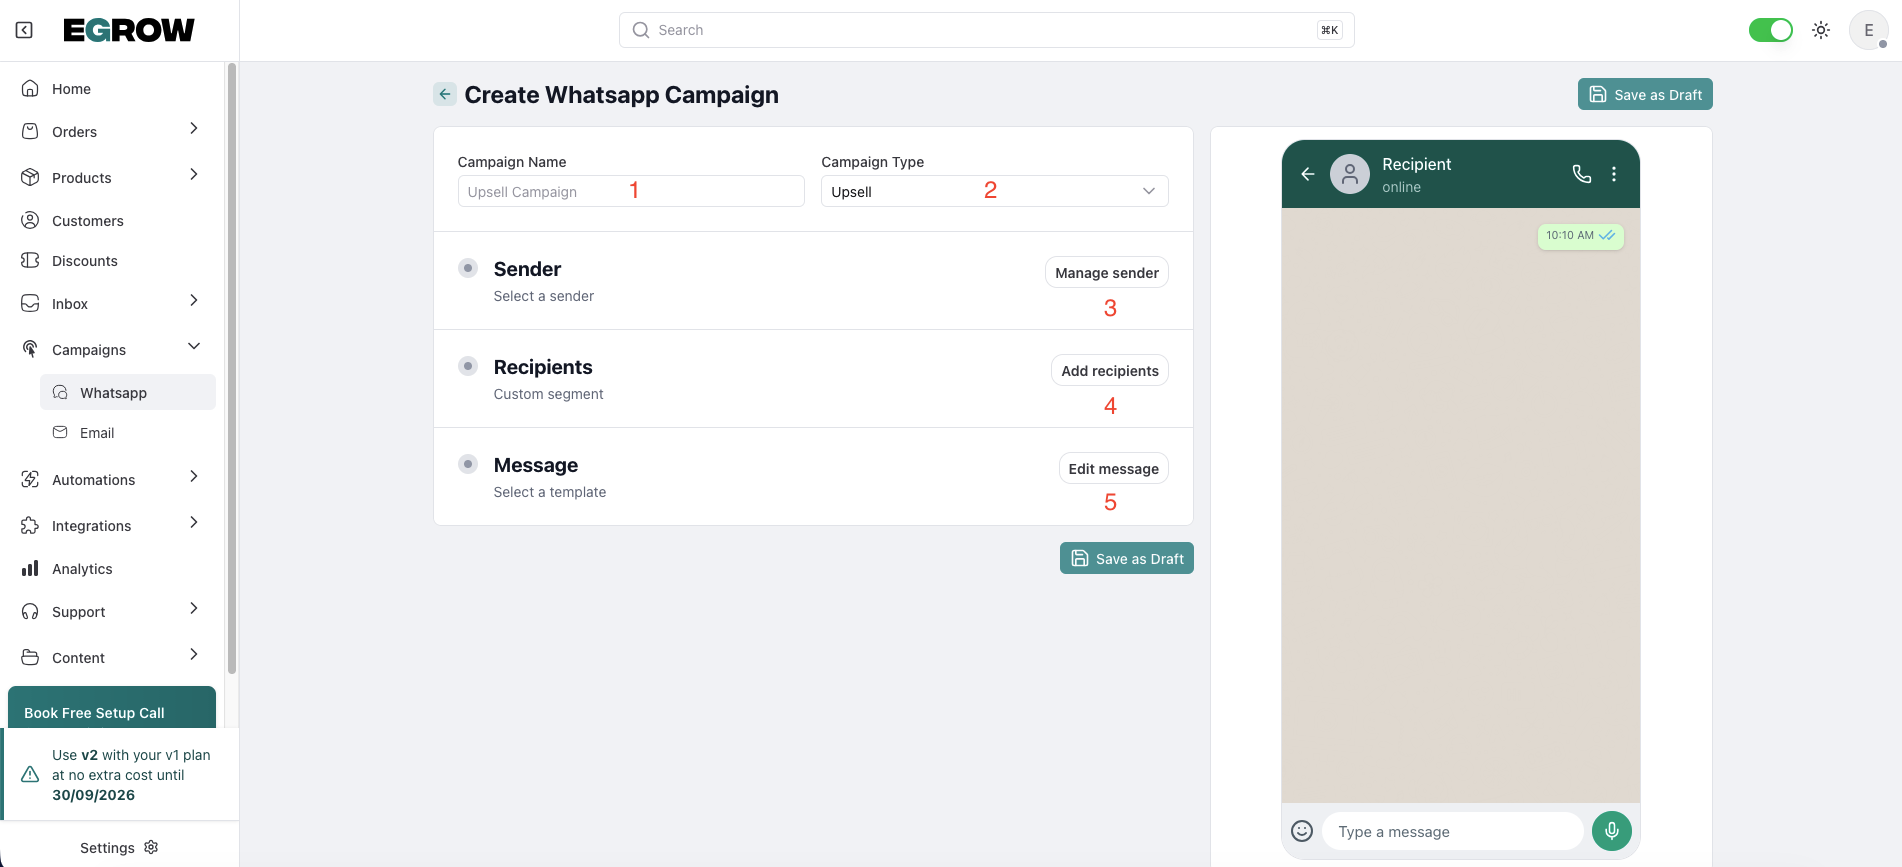
1️⃣ Campaign Name
Enter a clear internal name for your campaign.
Example: Upsell Campaign – February
2️⃣ Campaign Type
Select the campaign type from the dropdown (Example: Upsell).
Step 3: Select the Sender (WhatsApp Connection)
In the Sender section: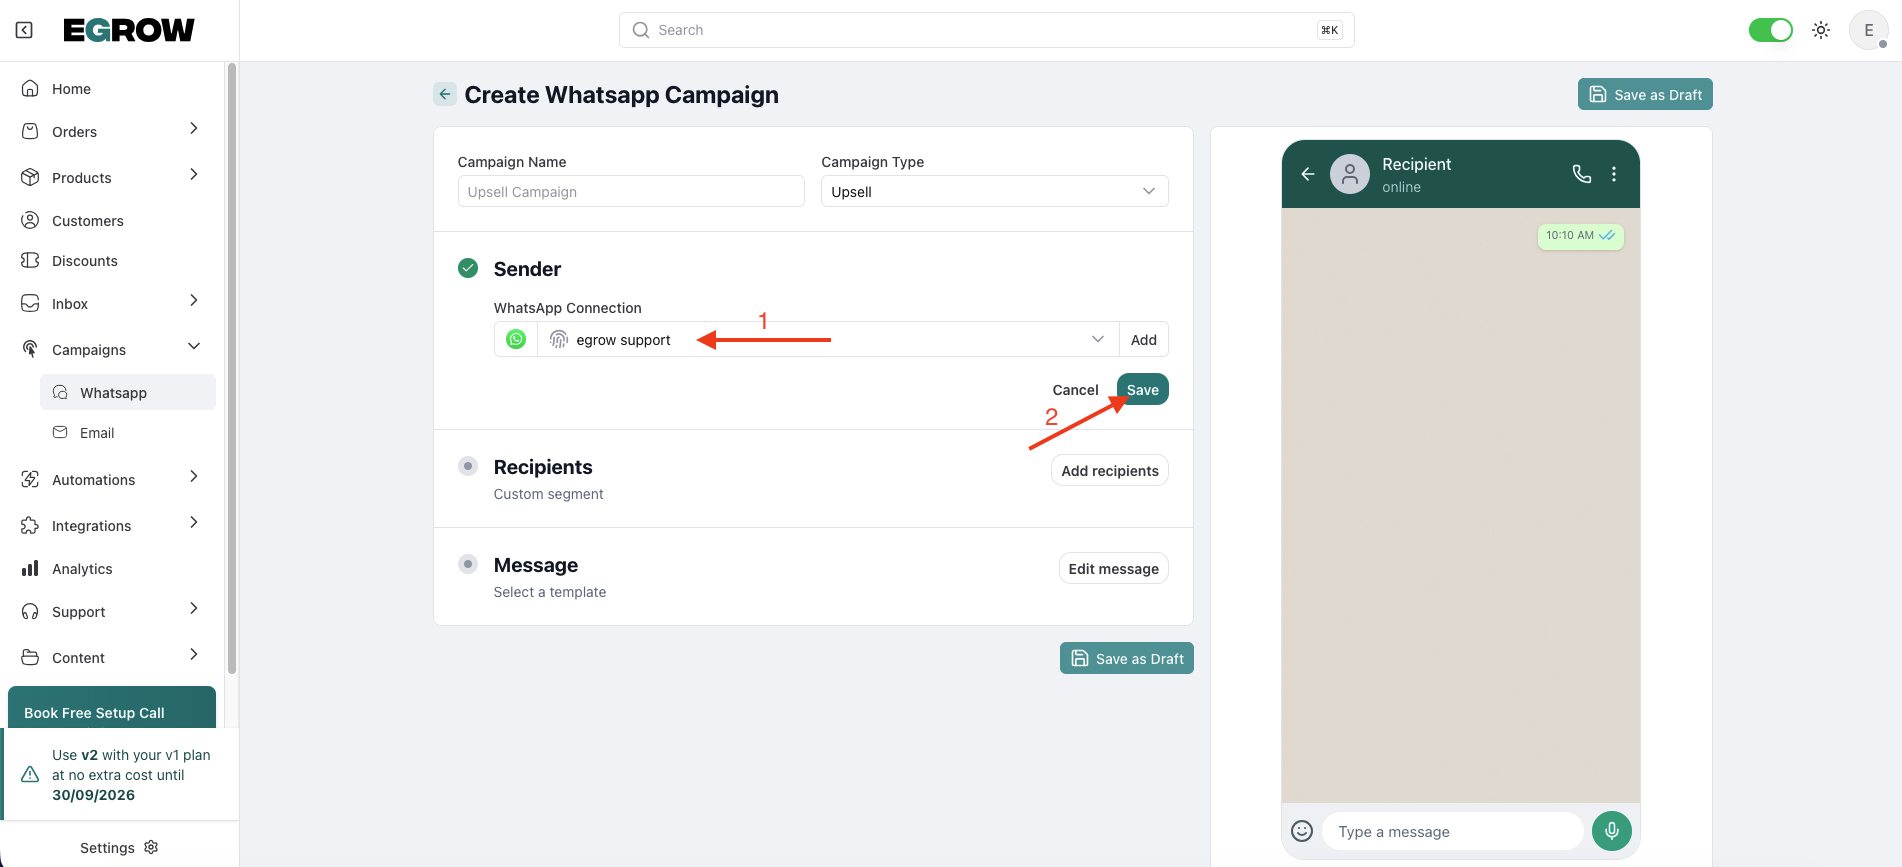
Click Manage sender
Select the WhatsApp connection you want to use
⚠️ The Sender section now contains your WhatsApp connection selection.
Make sure:
The correct WhatsApp Business number is selected
The connection is active
Step 4: Choose Recipients
In the Recipients section, click Add recipients.
You will now see 3 available options: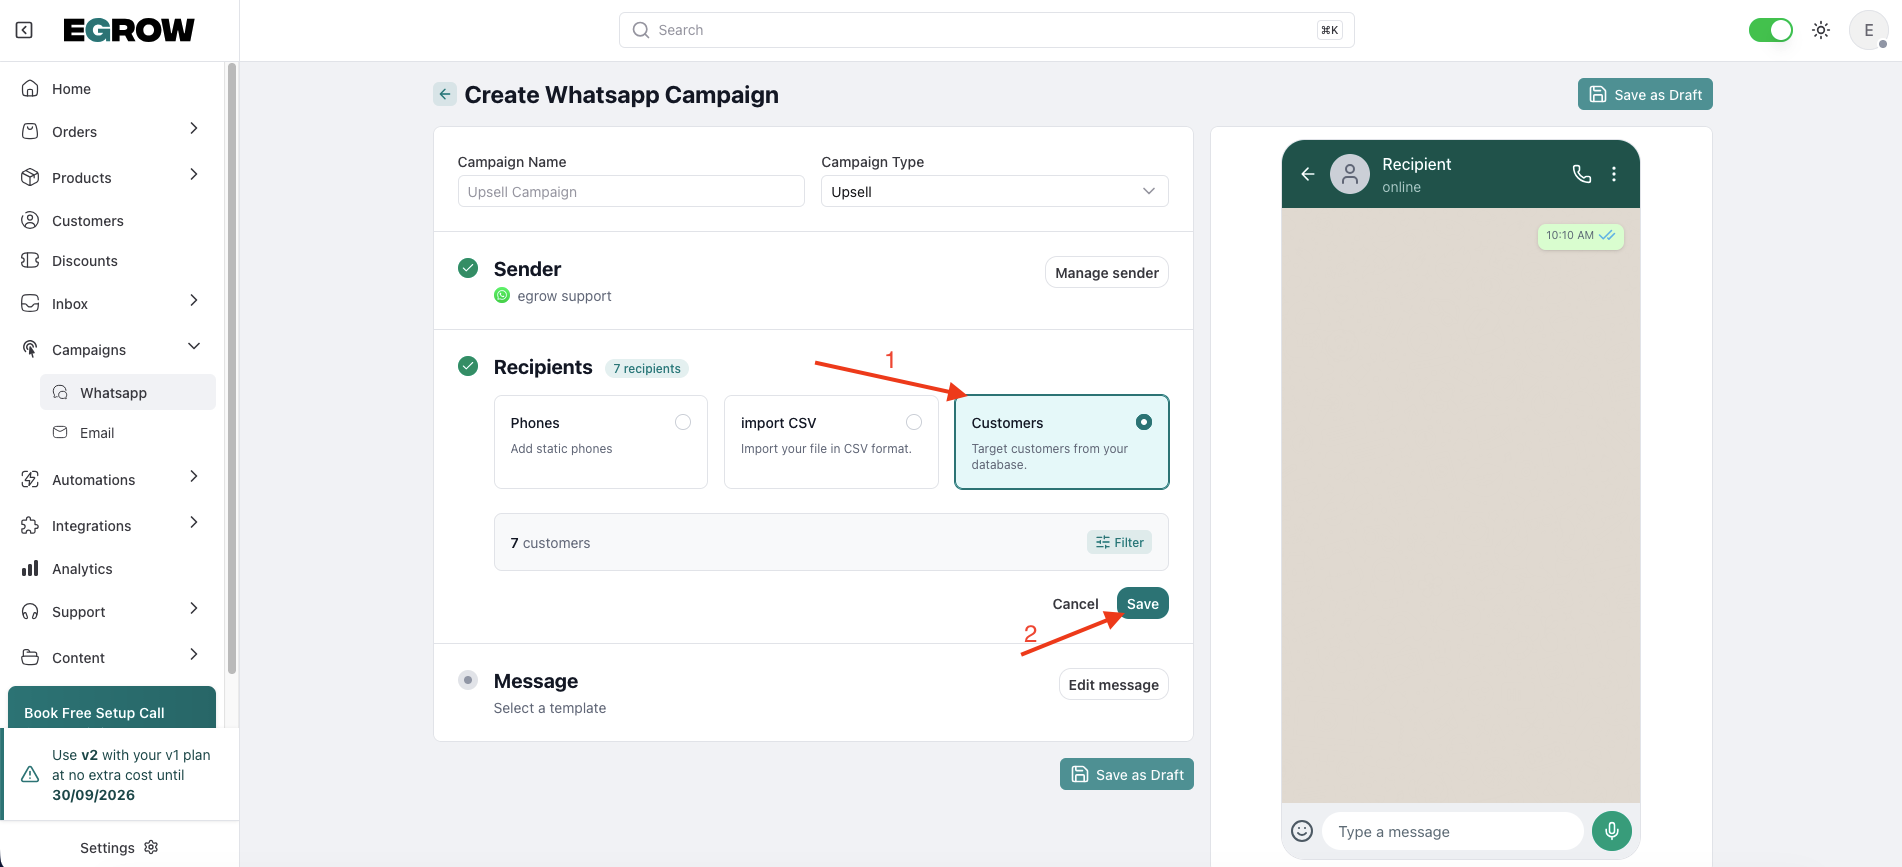
📱 1. Phones
Add static phone numbers manually.
Use this option if:
You want to target specific numbers
You’re sending to a small list manually
📂 2. Import CSV
Upload a CSV file containing phone numbers.
Use this option if:
You have an external list
You exported numbers from another system
Make sure:
File format is CSV
Phone numbers include country codes
👥 3. Customers
Target customers directly from your eGrow database.
Use this option if:
You want to send to existing customers
You want to use segmentation
This is ideal for marketing campaigns like:
Upsells
Promotions
Re-engagement campaigns
Step 5: Select the Message (WhatsApp Template)
In the Message section: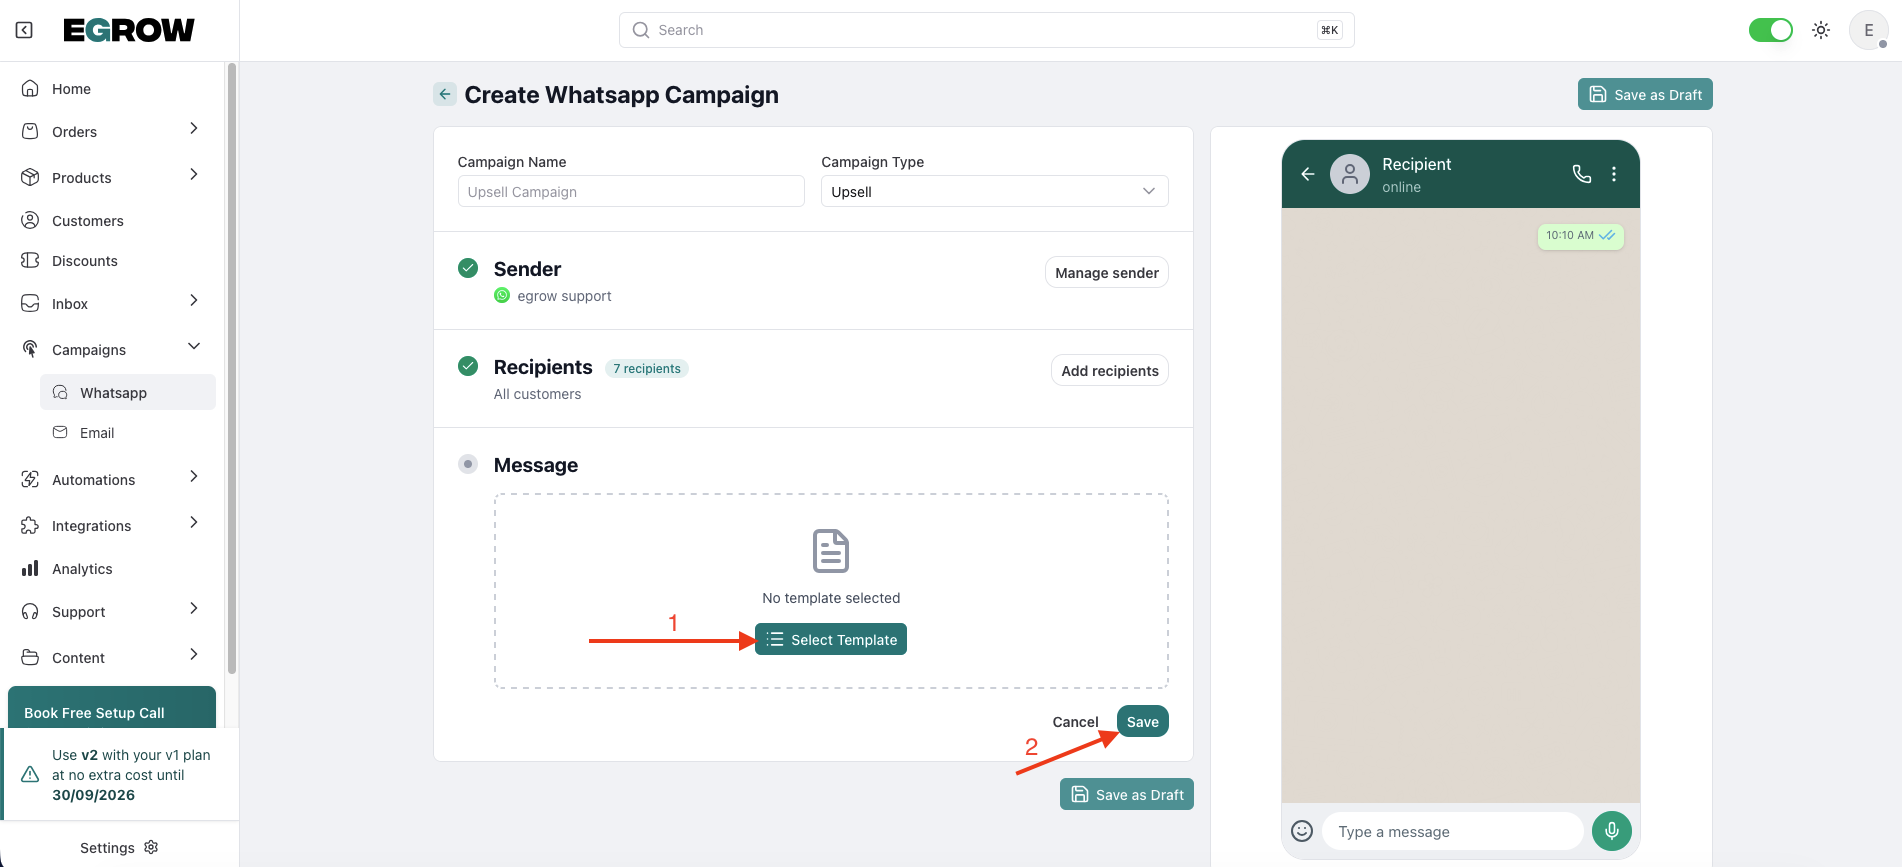
Click Edit message
Select the approved WhatsApp template you want to use
⚠️ Only approved templates will appear in the list.
Make sure:
Template category matches your campaign goal
Variables are correctly mapped (if required)
Step 6: Save as Draft
After completing all sections:
Click Save as Draft
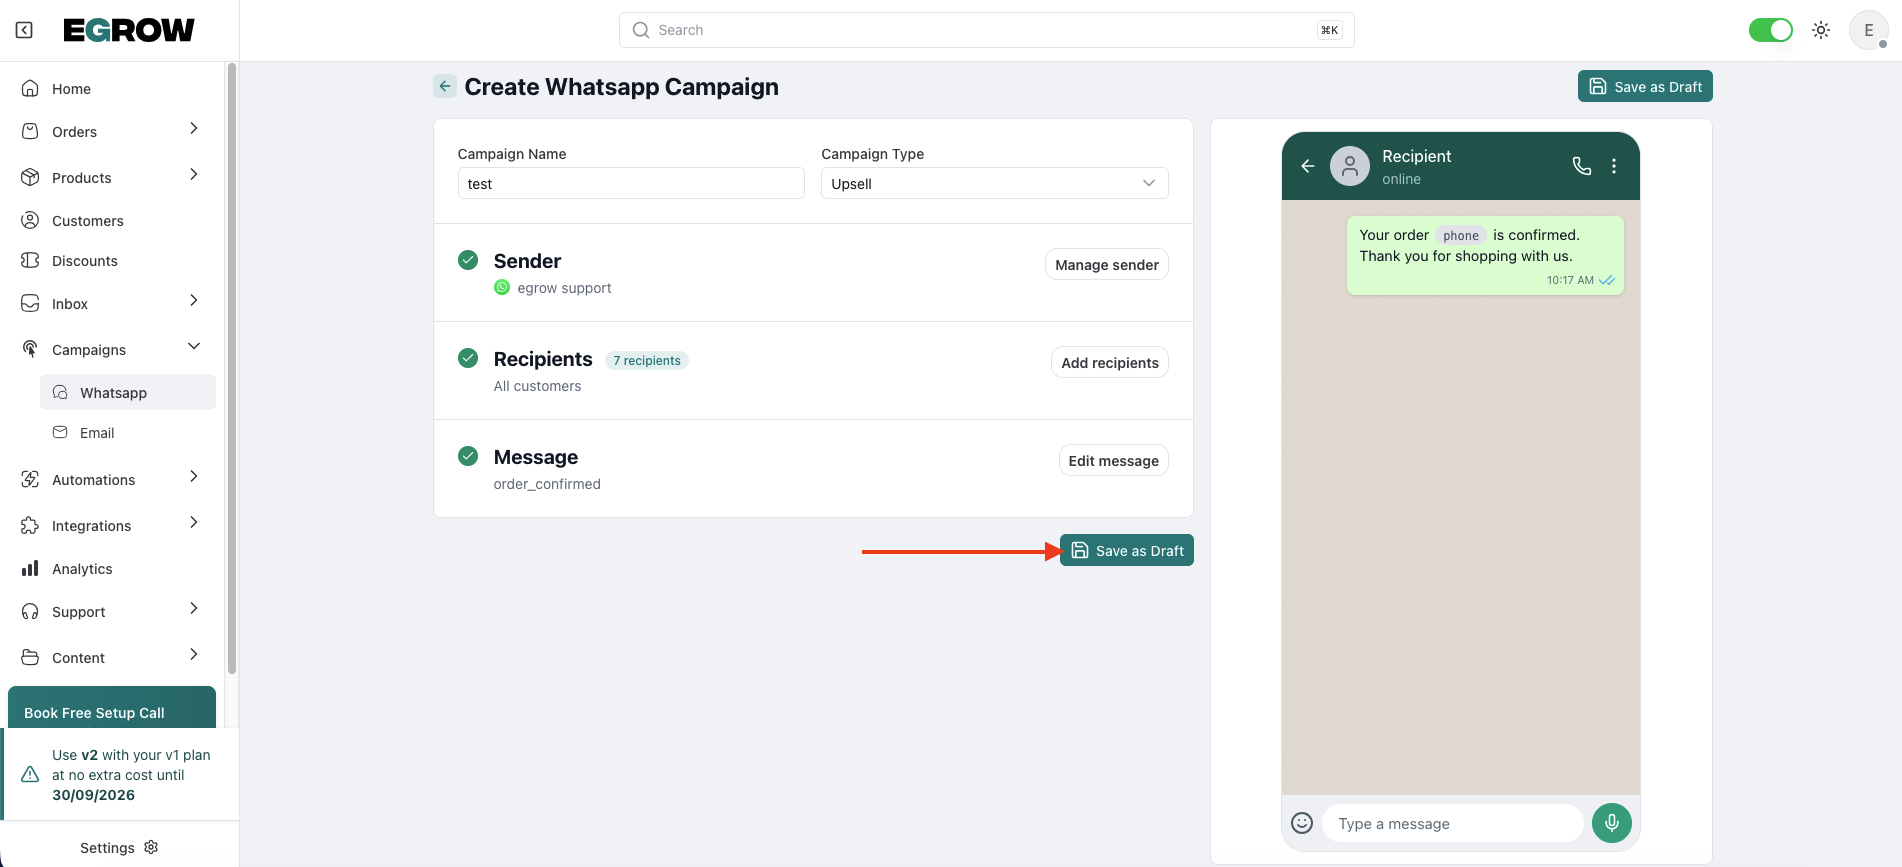
This is mandatory before sending or scheduling.
Once saved, new options will appear.
Step 7: Test or Schedule the Campaign
After saving the draft, you will see two new buttons:
🧪 Test Campaign
Send a test message to your test number.
Use this to:
Verify formatting
Check variables
Confirm template rendering
Highly recommended before scheduling.
📅 Schedule
Schedule your campaign for a specific date and time.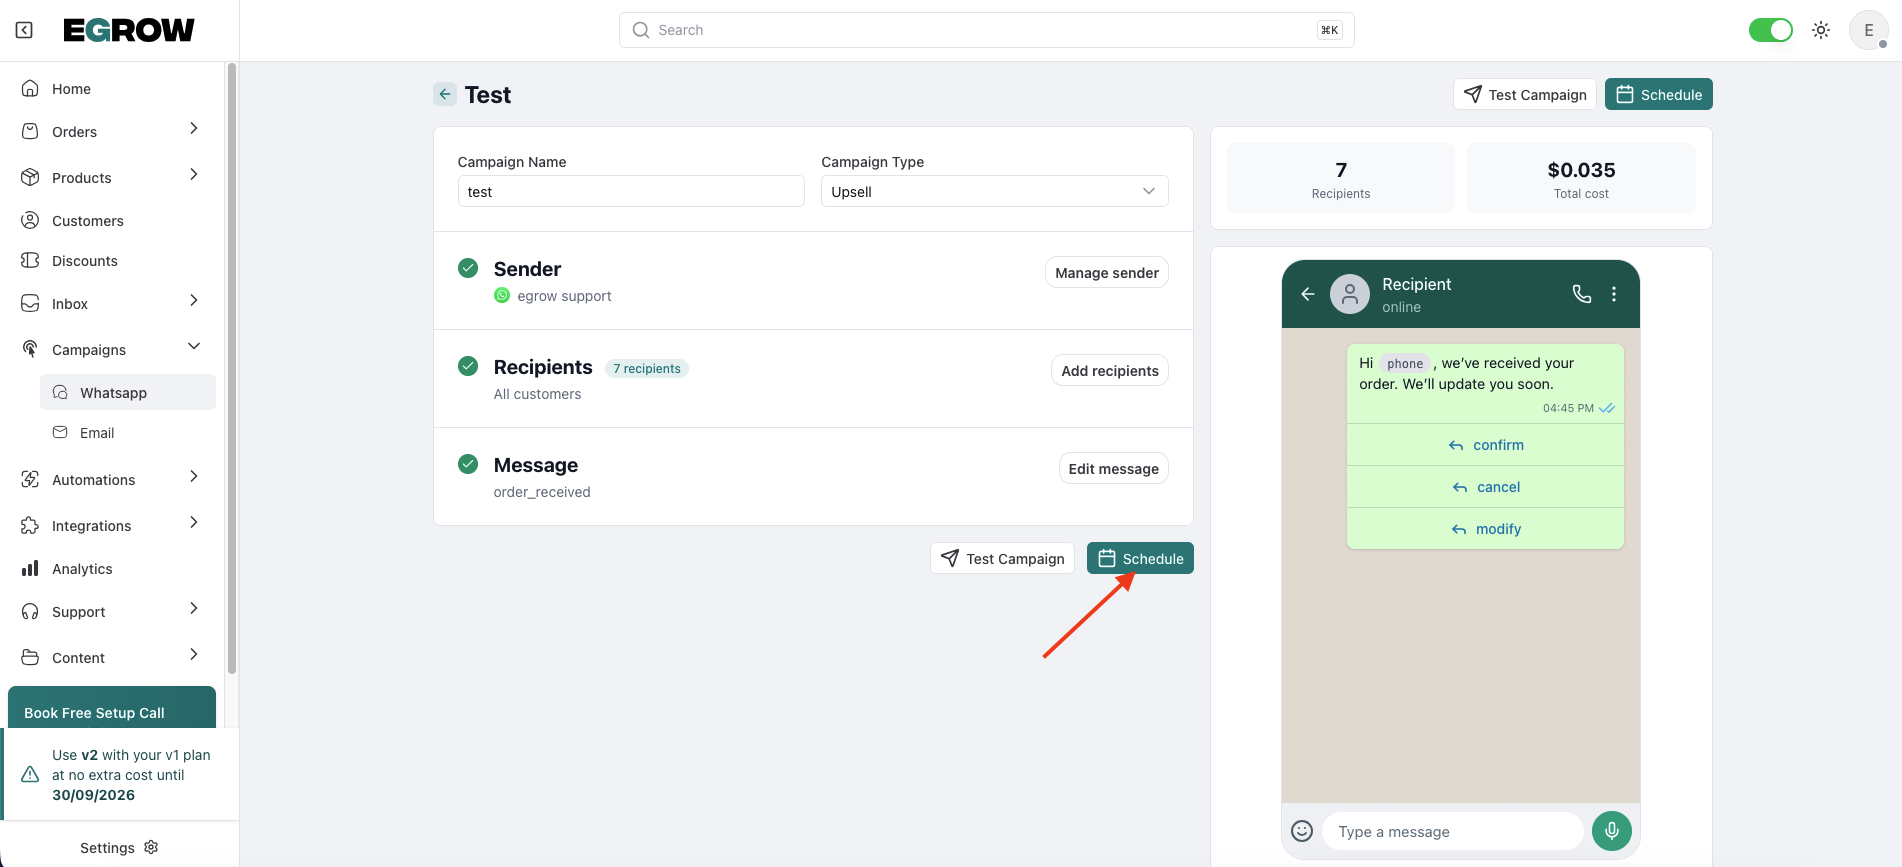
Steps:
Click Schedule
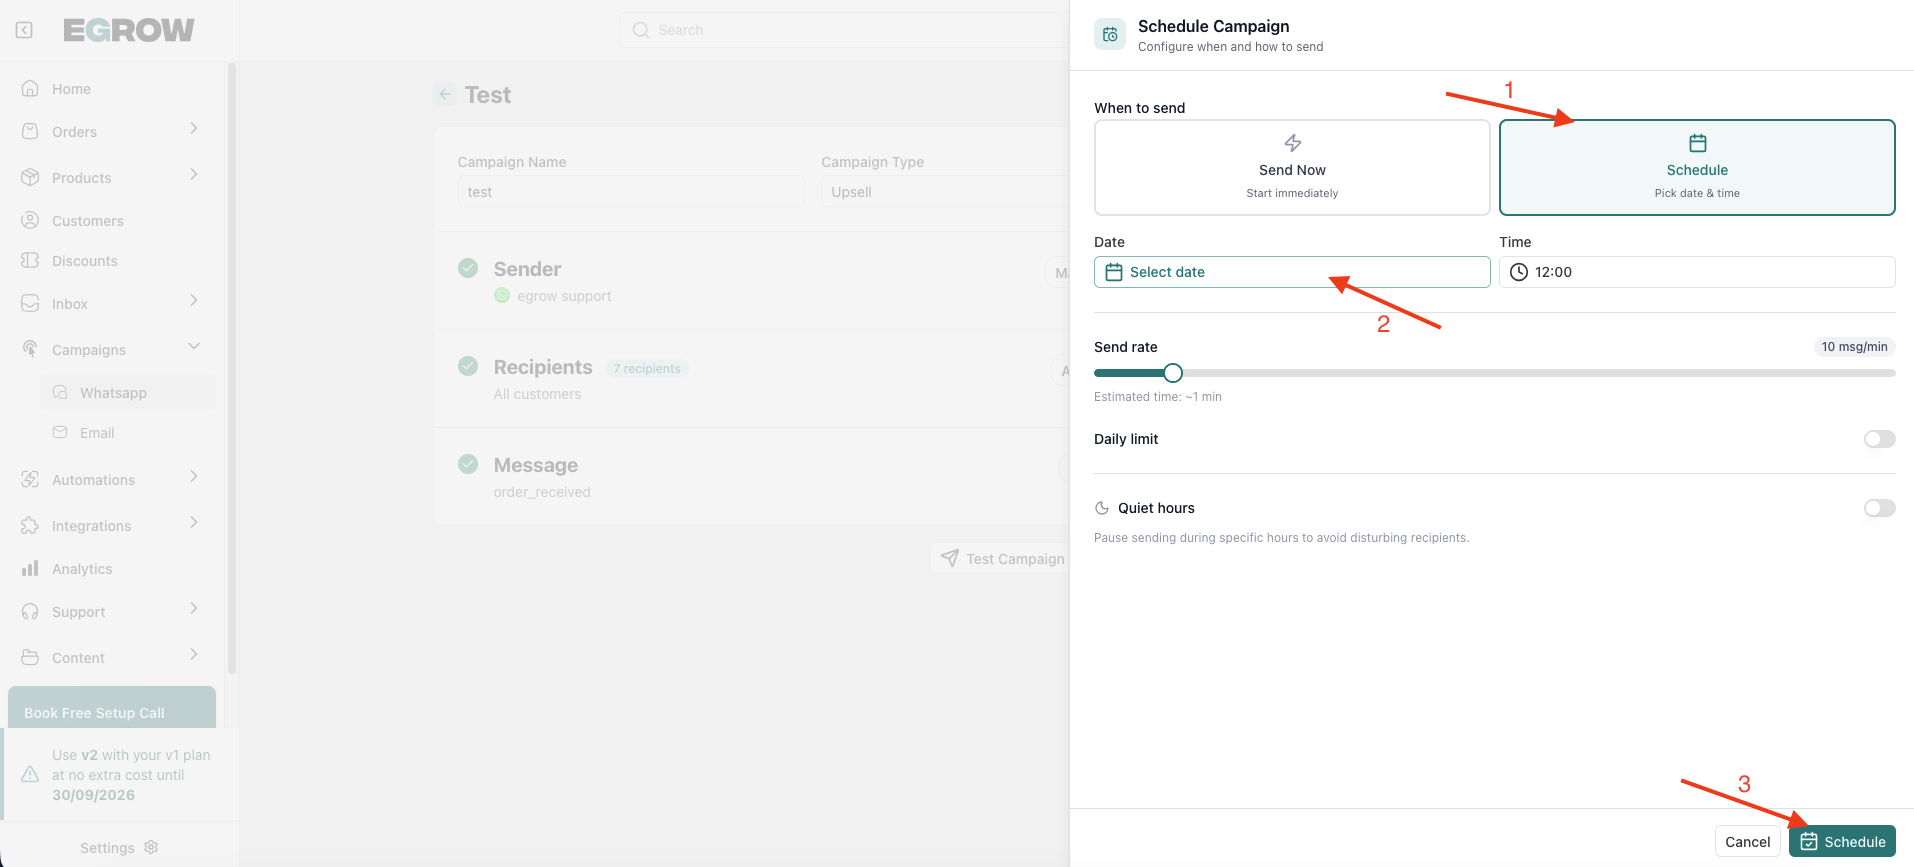
Select date
Select time
Confirm
Your campaign will automatically send at the selected time.
Final Workflow Overview
Enter campaign name
Select campaign type
Choose WhatsApp sender
Add recipients (Phones, CSV, or Customers)
Select WhatsApp template
Click Save as Draft
Test or Schedule
Best Practices
Always test before scheduling
Double-check your recipient source
Make sure template variables are correctly filled
Avoid sending large campaigns without segmentation