Step 1: Re-enter the Editor
If you’ve already installed a template, you can go back and change its settings whenever your business needs evolve.
Go to Automations in your left-hand sidebar.
Stay on the main Automations list page.
Find the specific automation you want to modify.
Click the three dots (⋮) on the far right and select Edit.

Step 2: Choose Your Trigger Condition
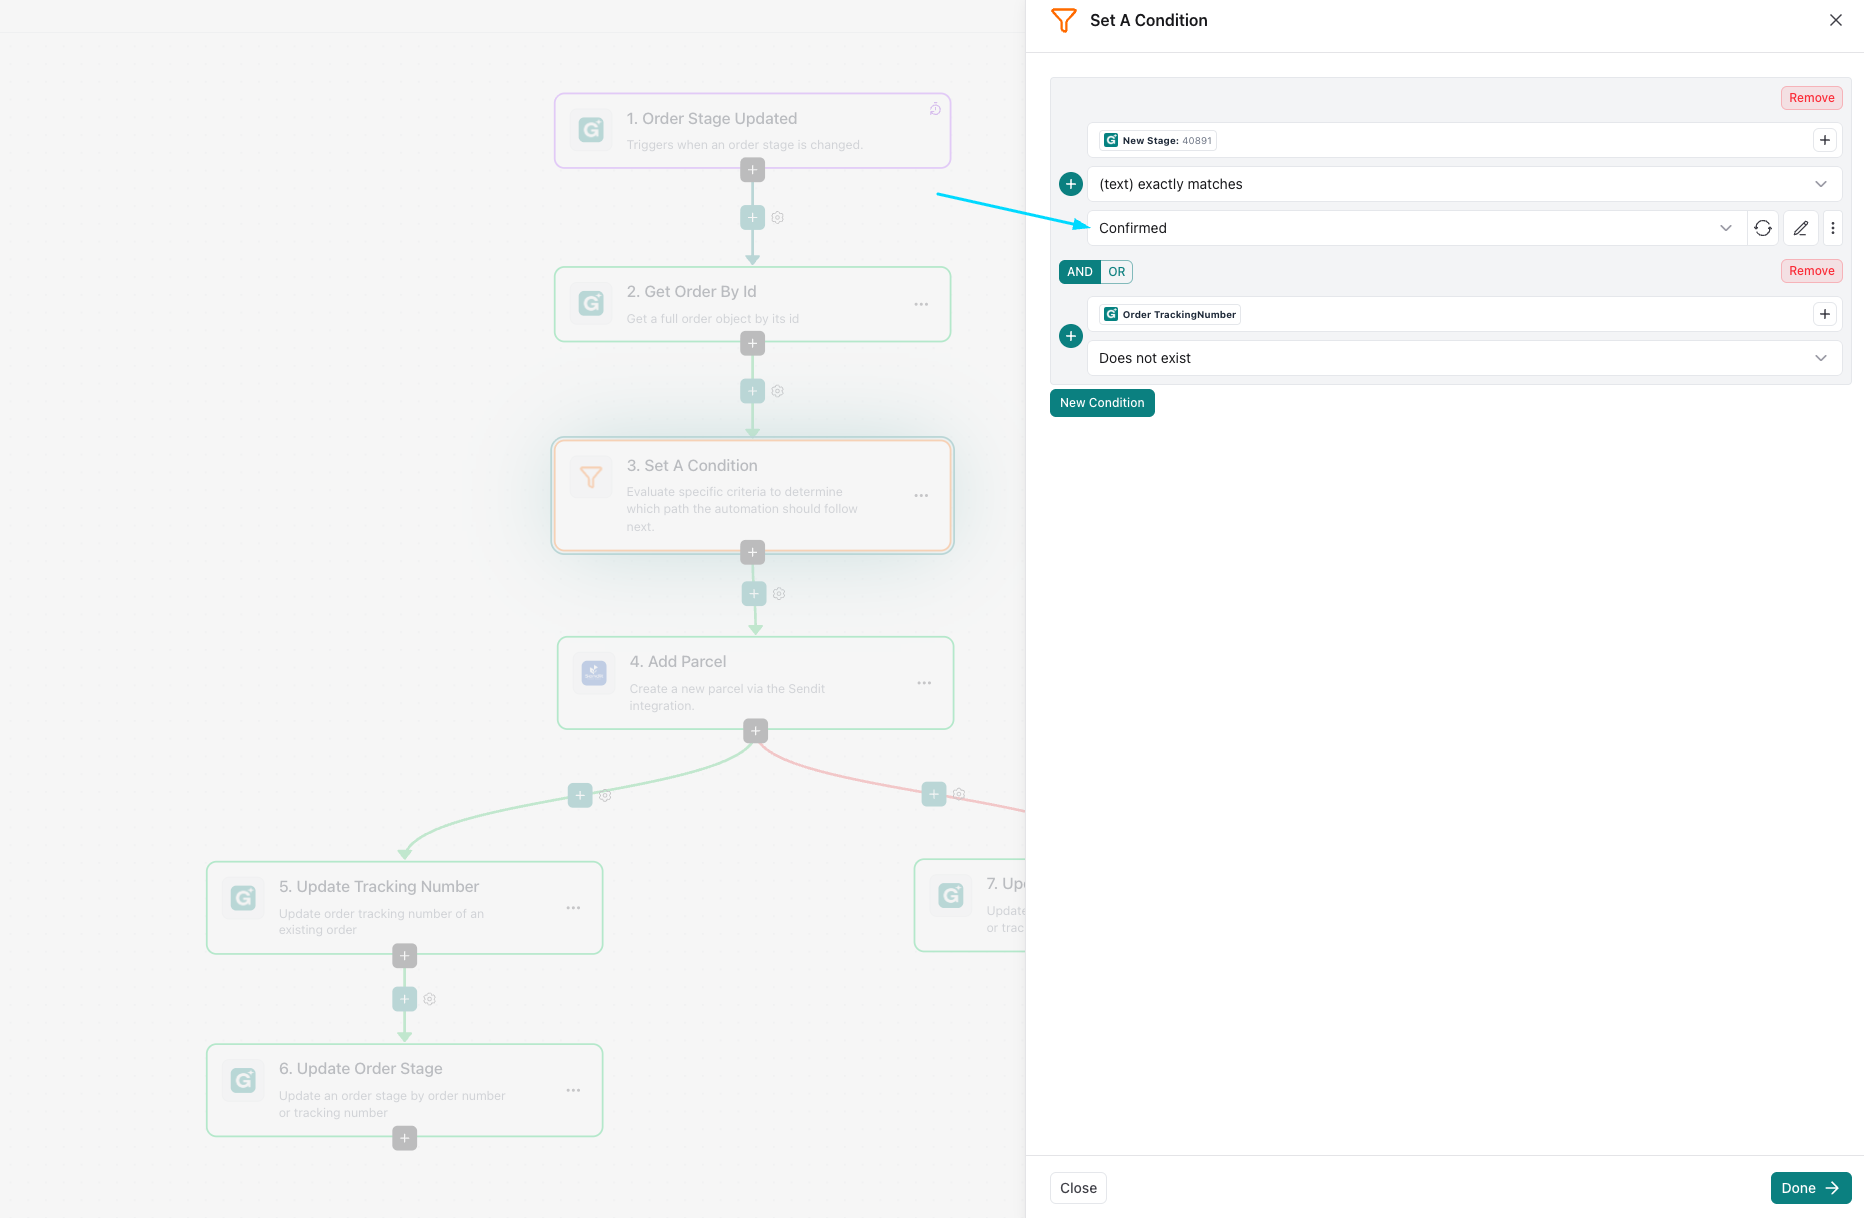
Most users want to control exactly which order stage (like "Confirmed" or "Validated") sends the info to the shipping company. This happens in the Set A Condition block.
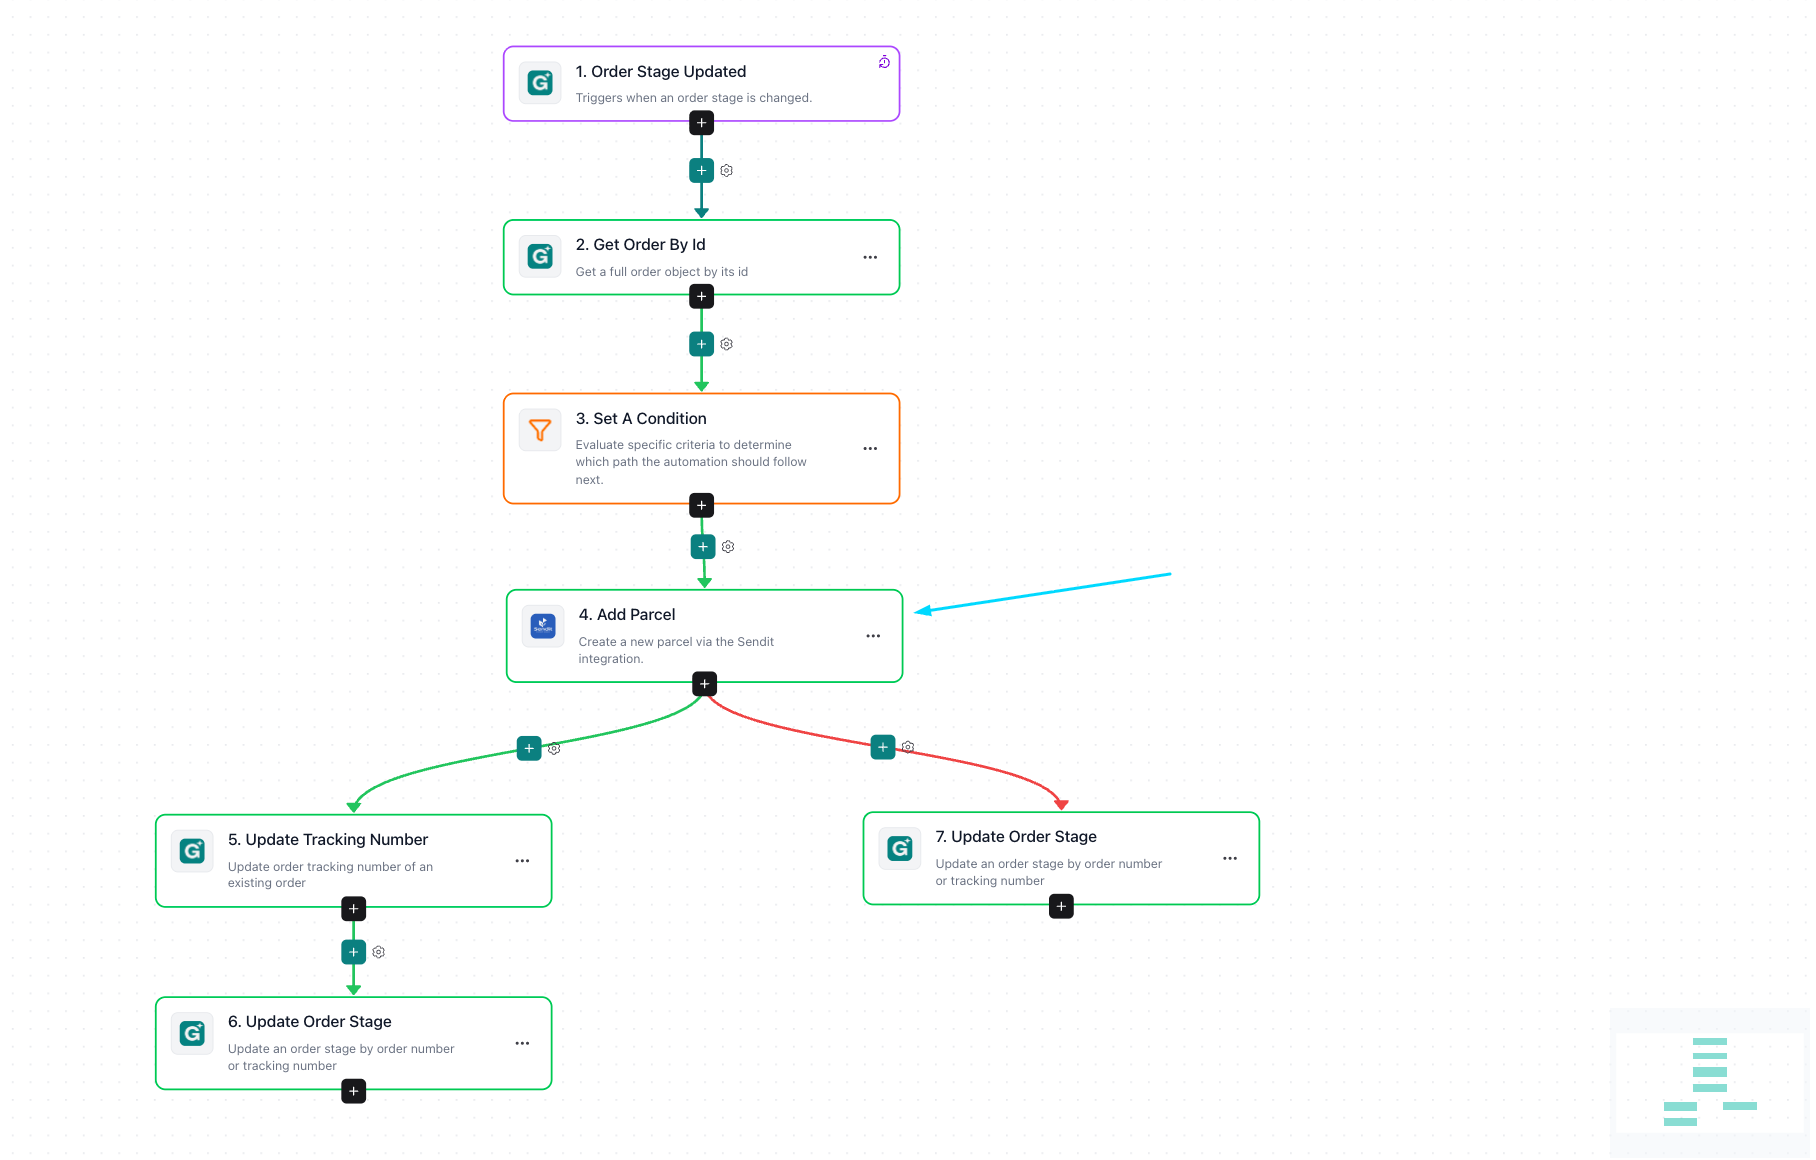
In the workflow map, click on the orange box labeled "Set A Condition."
A panel will open on the right. Look for the row that mentions "New Stage."
Click the dropdown menu and select your preferred stage (e.g., changing it from "Any" to "Confirmed").
Click Done at the bottom of the panel.
Step 3: Configure Your Parcel Preferences
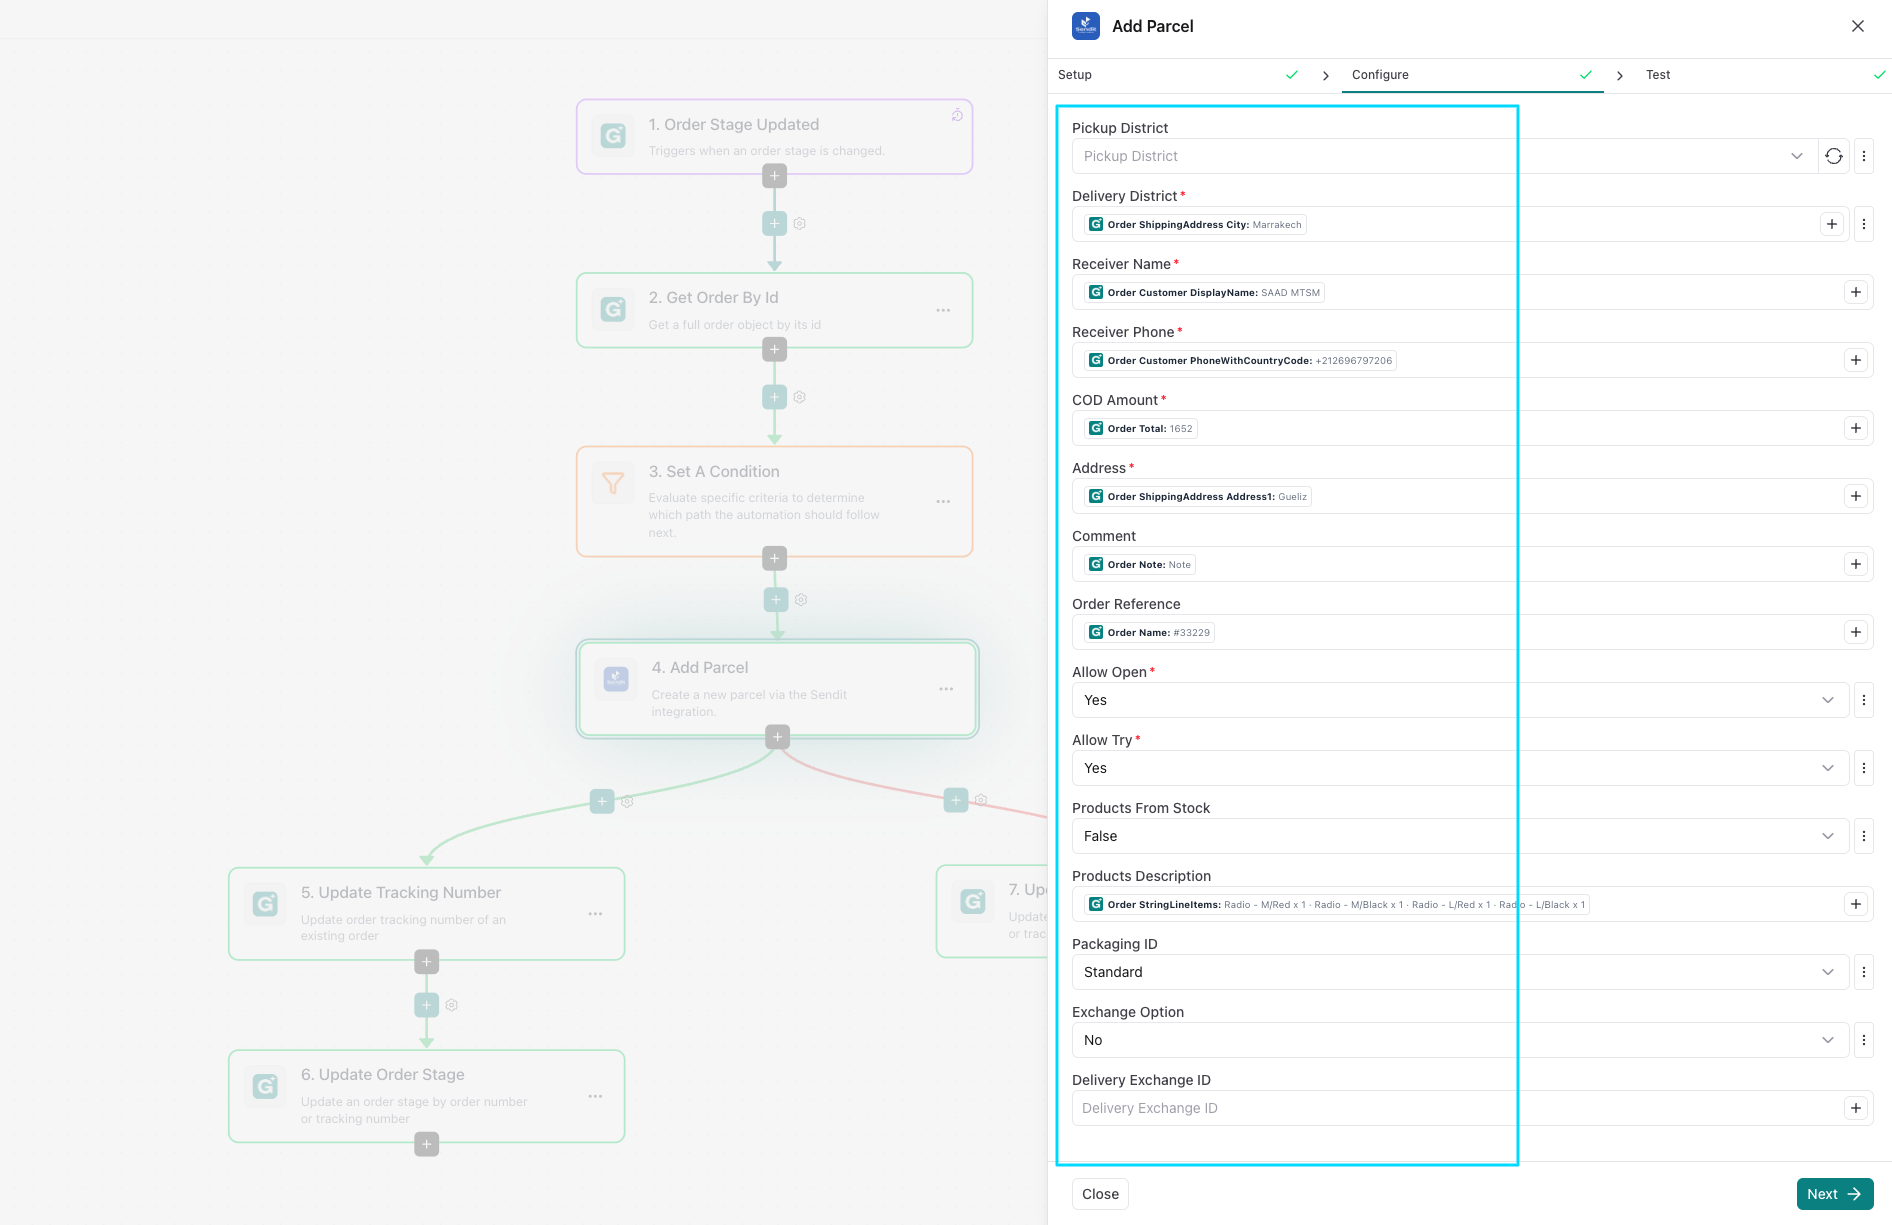
This is where you set the "rules" for the shipping company. In the Add Parcel configuration, you can decide on things like "Allow Open" or "Allow Try."
Click on the green box labeled "Add Parcel."
In the configuration panel on the right, you can scroll through several options:
Allow Open: Change this to Yes if you want customers to check the product before paying.
Allow Try: Change this to Yes for clothing or footwear businesses.
Packaging ID: Select your standard packaging type.
Ensure the other fields (like Receiver Name and Address) are correctly mapped to your eGrow order data.
Click Next and then Done to save these settings.
Step 4: Save and Go Live
Your changes won't take effect until you hit the final save button.
Look at the top right corner of the editor.
Click the teal Save Changes button.
You're all set! Your automation is now perfectly tuned to your business preferences.
After saving, it’s a good idea to move one "test" order to your chosen stage (e.g., "Confirmed") to make sure the parcel is created in your carrier's system exactly how you wanted!