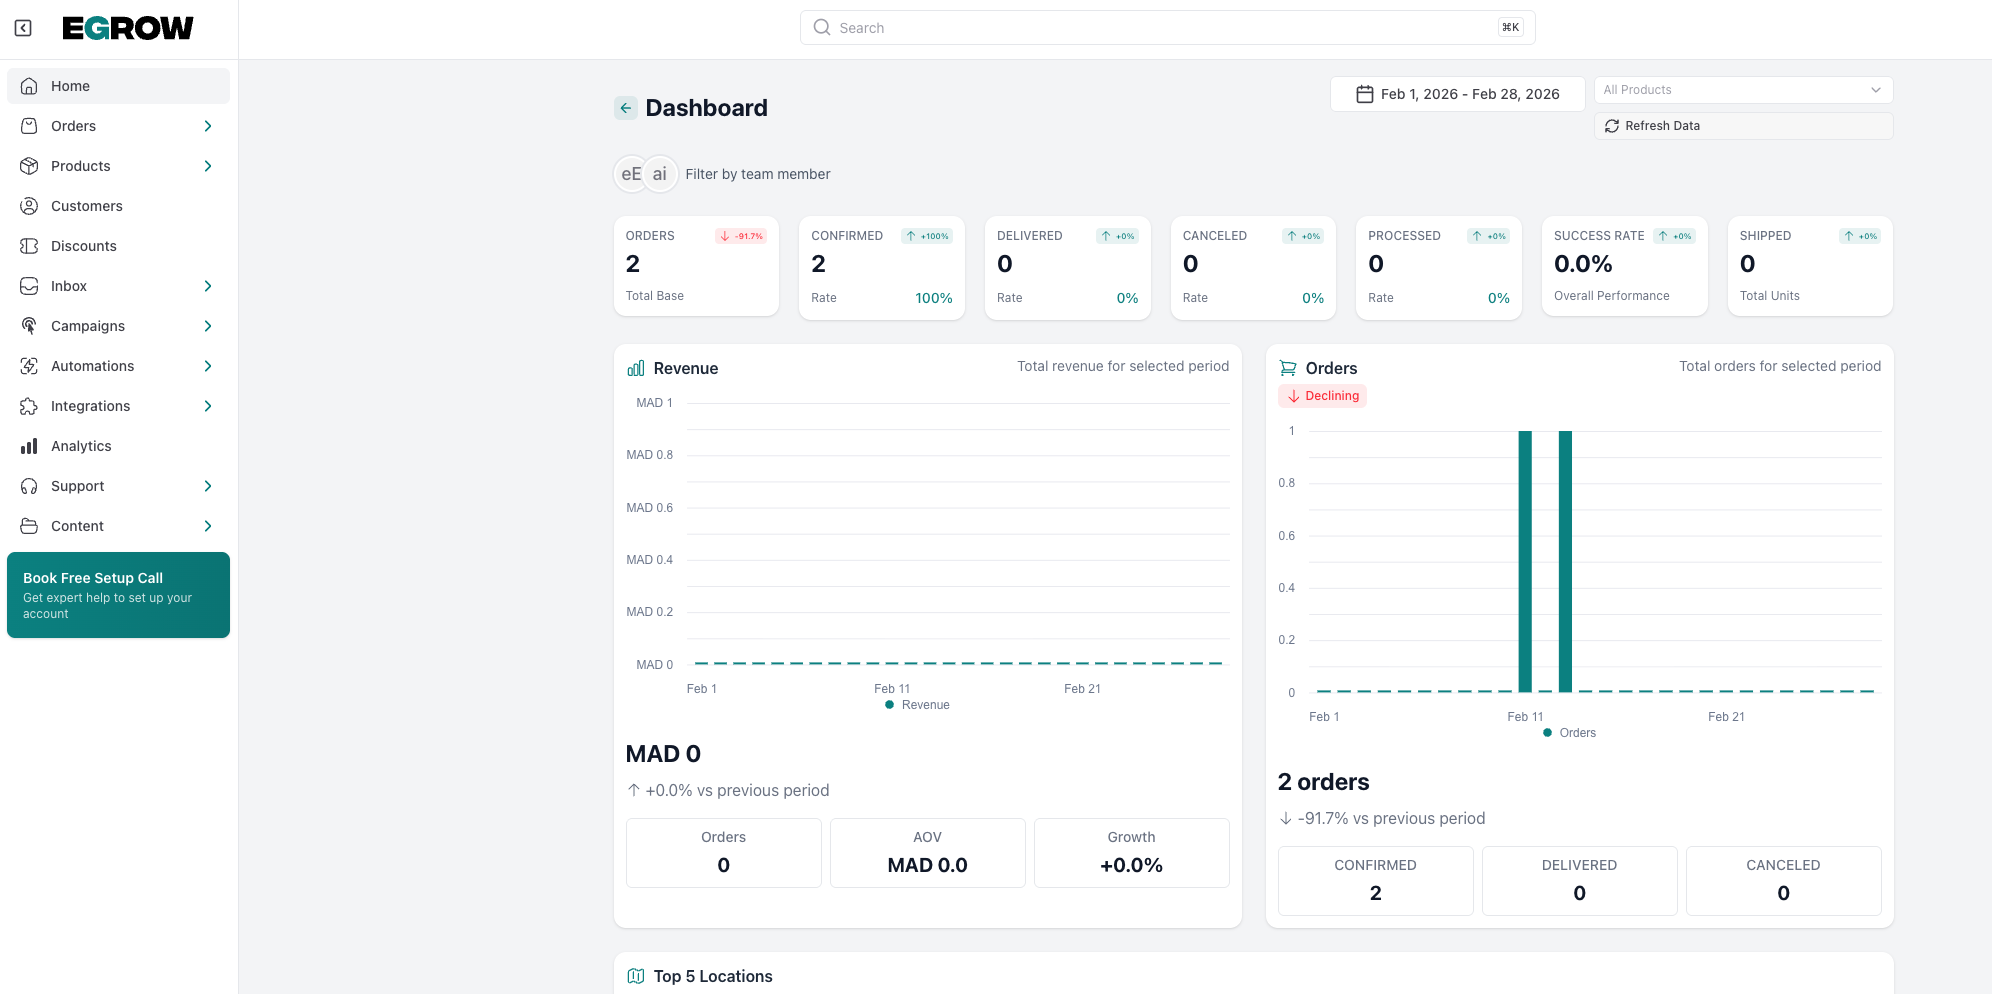
Step 1: Log in to Your eGrow Dashboard
Start by logging in to your eGrow account. Once inside, you’ll see your main dashboard where all features are accessible from the side menu.
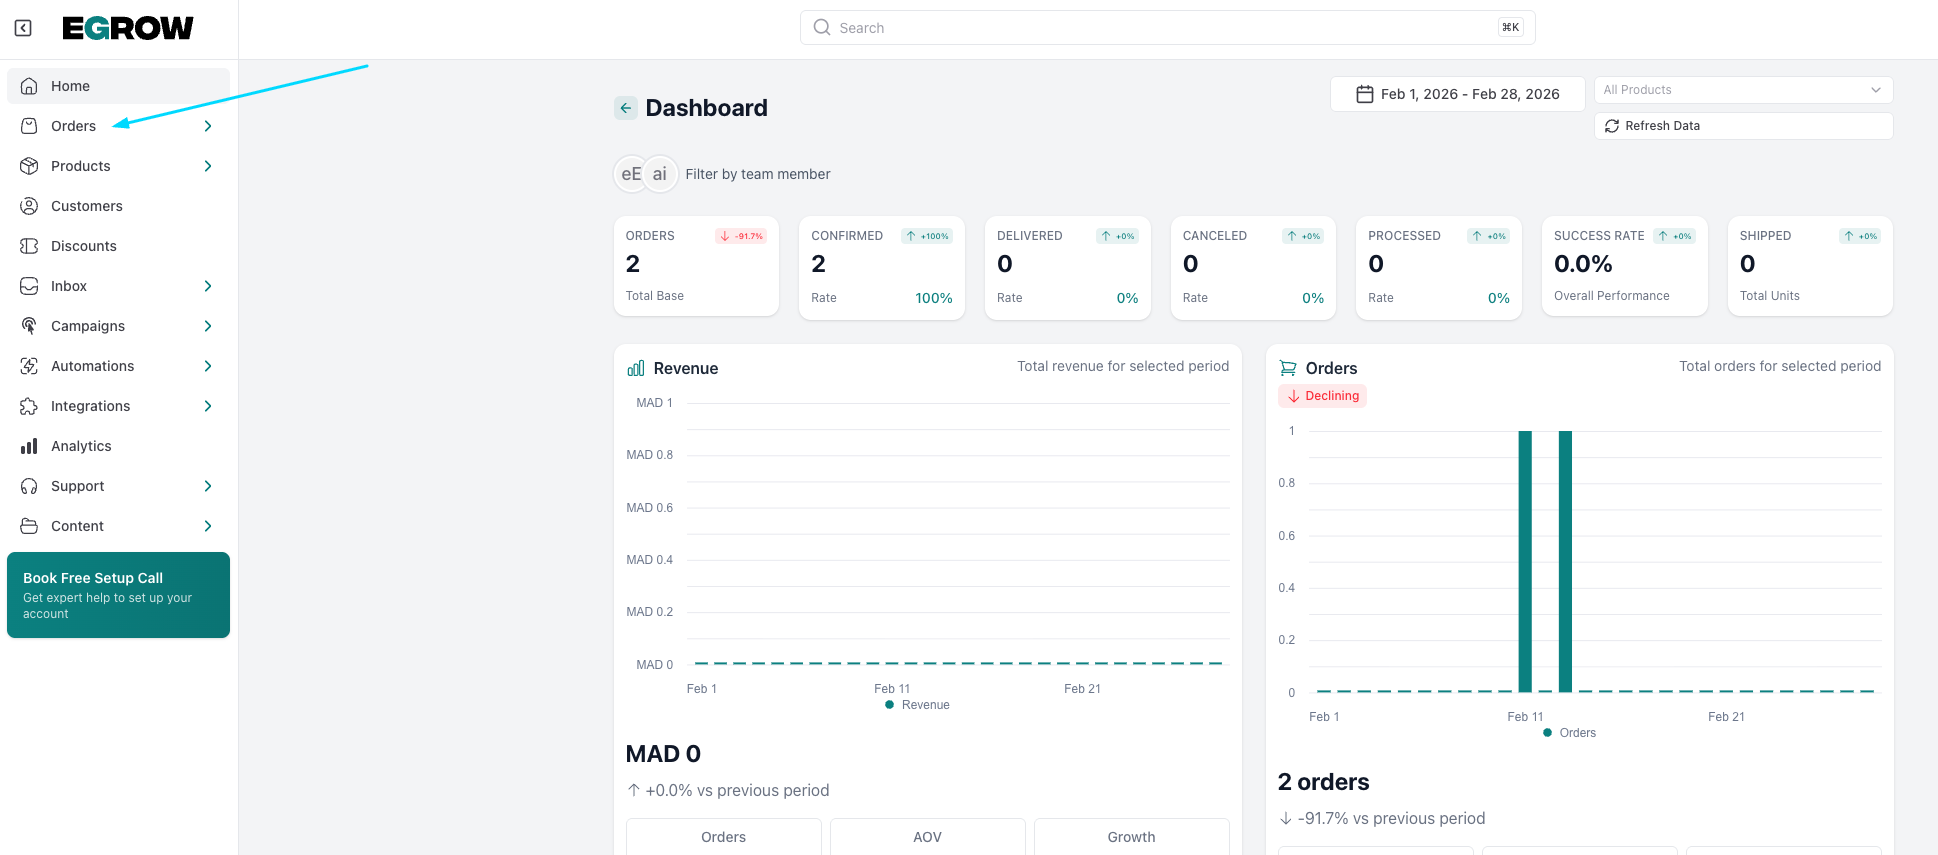
Step 2: Open the Orders Section
From the left menu, click on Orders.
This section shows you all incoming orders in one list, instead of searching through WhatsApp conversations.
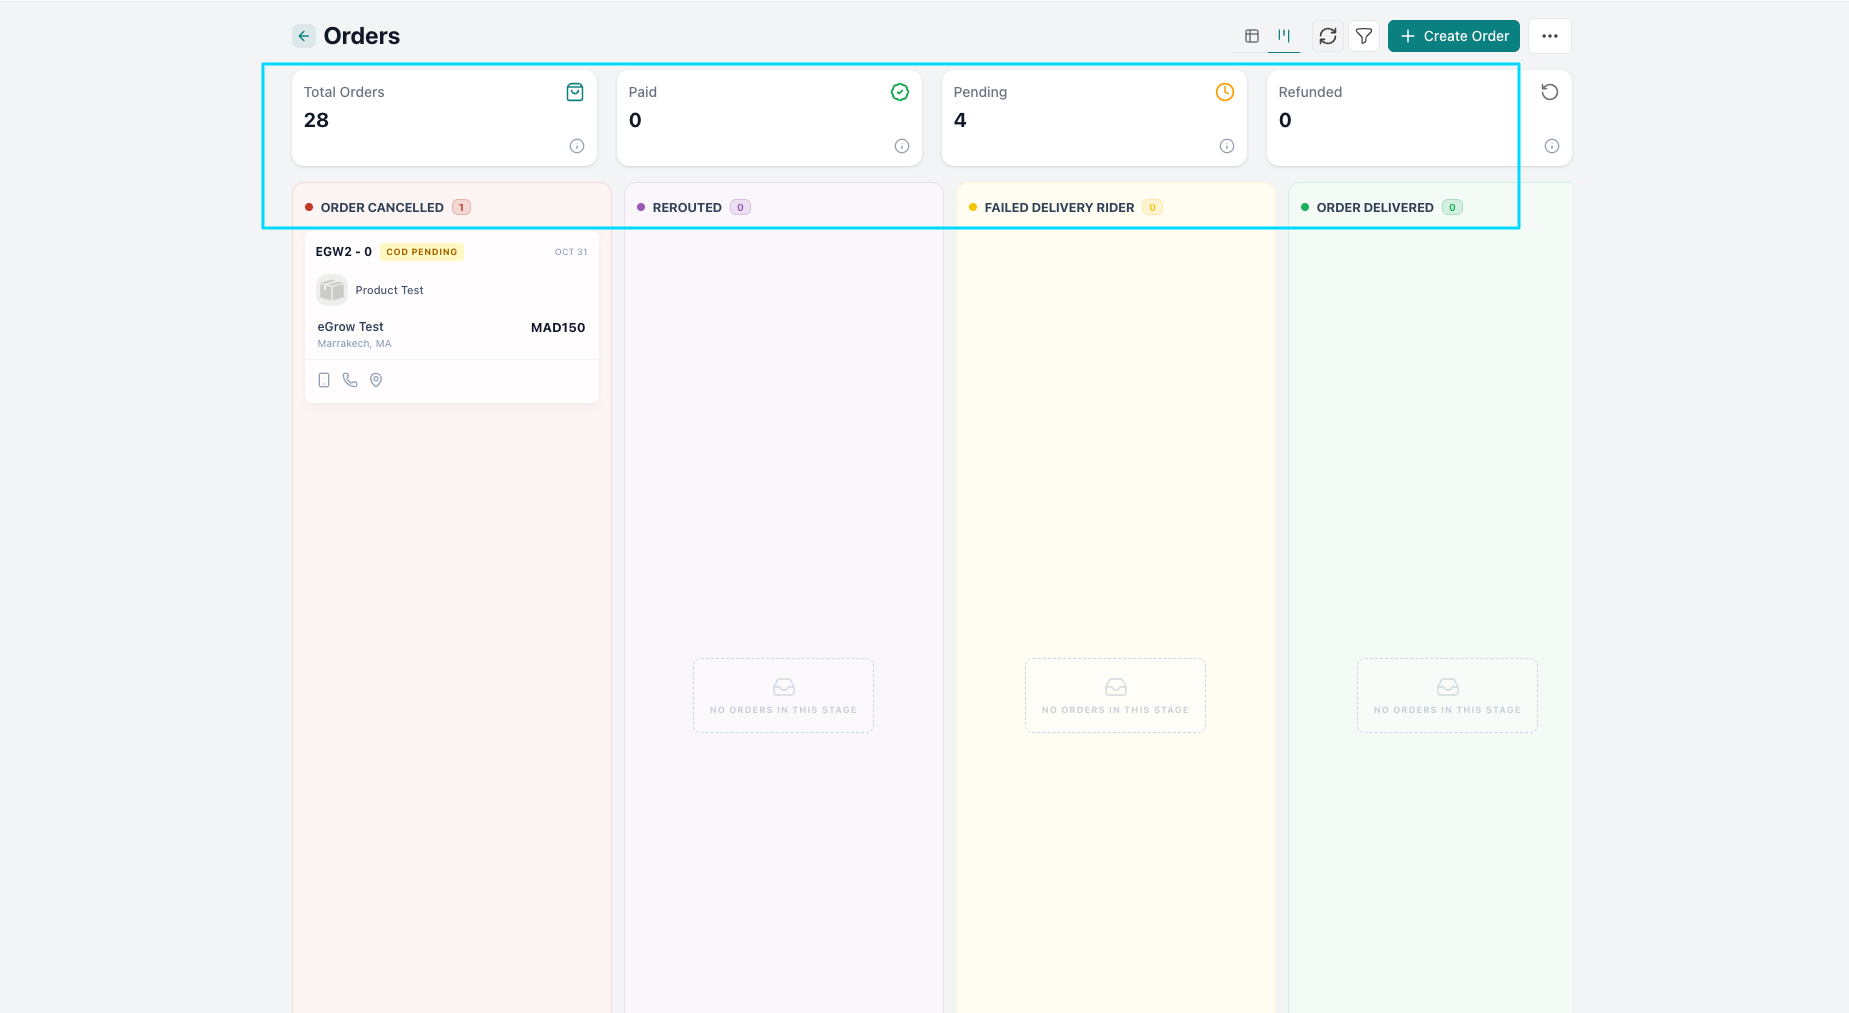
Step 3: View All Orders in One Place
In the Orders dashboard, you can see:
New orders
Confirmed orders
Orders in progress
Delivered or completed orders
This gives you a clear overview of your business activity in real time.
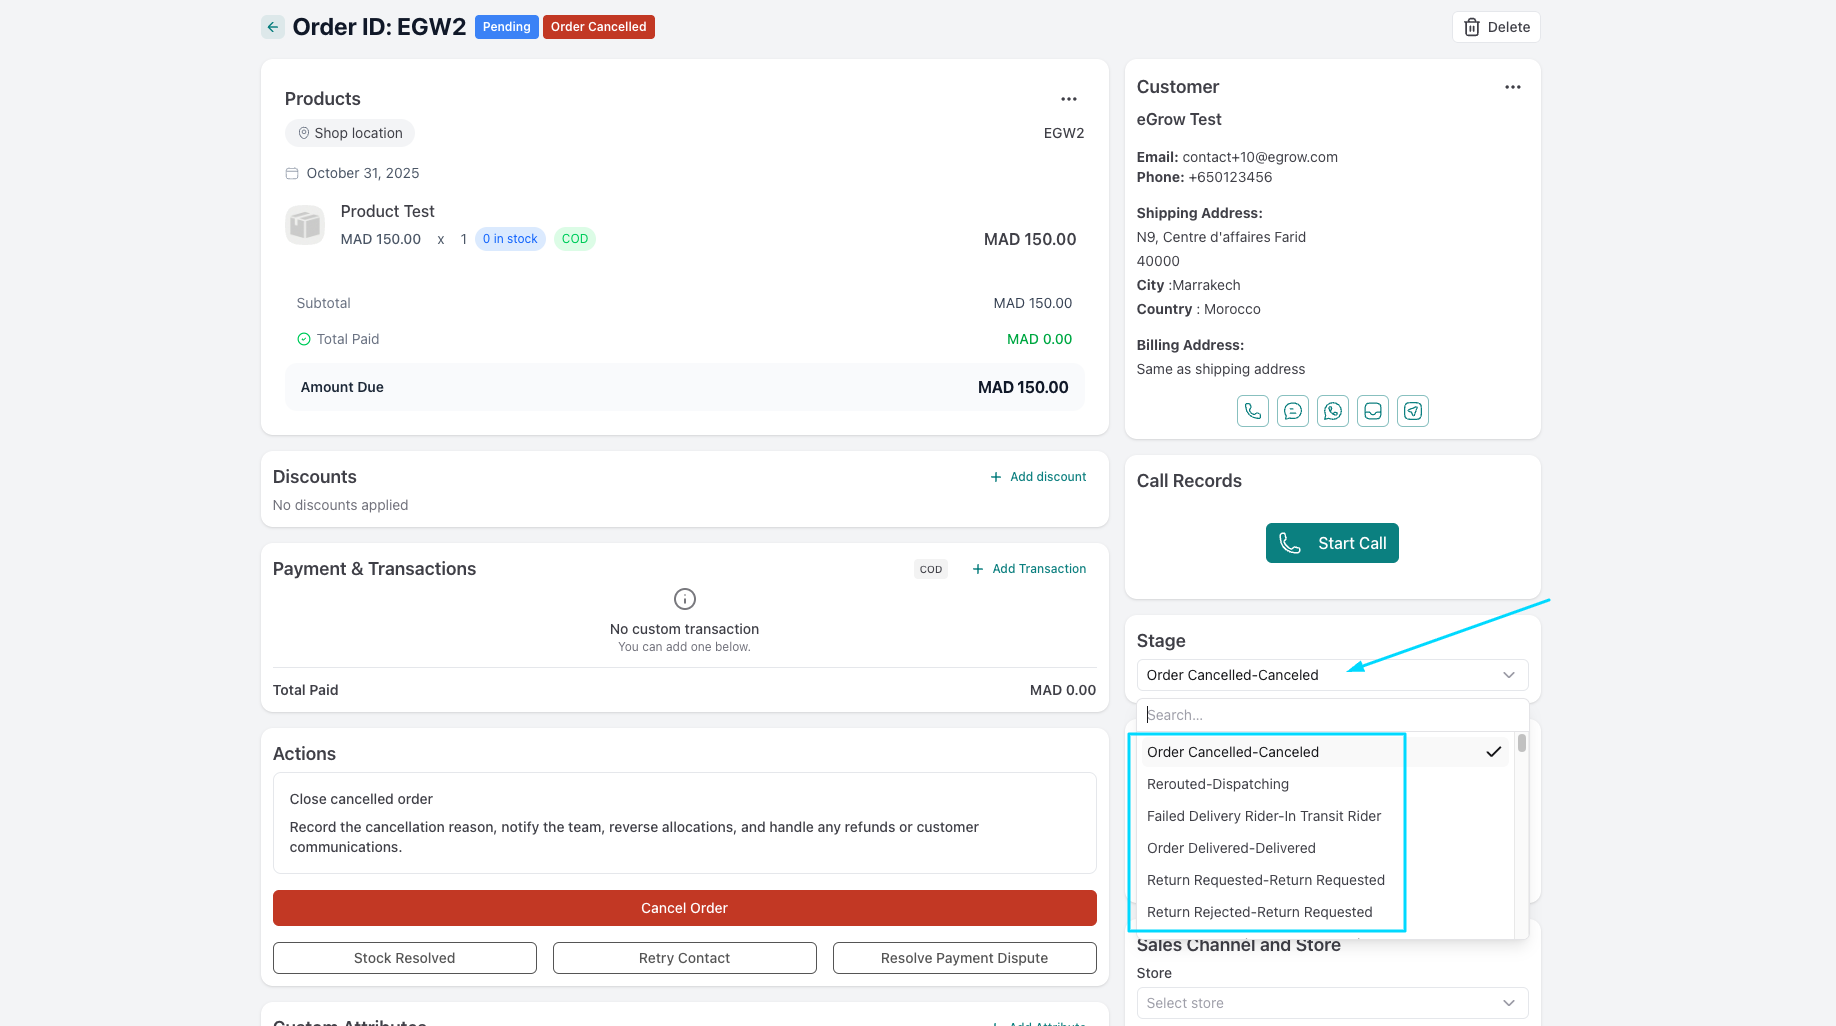
Step 4: Update the Order Status
Click on any order to open its details.
You can change the order stage (for example: New → Confirmed → Shipped → Delivered).
This helps your team know exactly what is happening with each order.
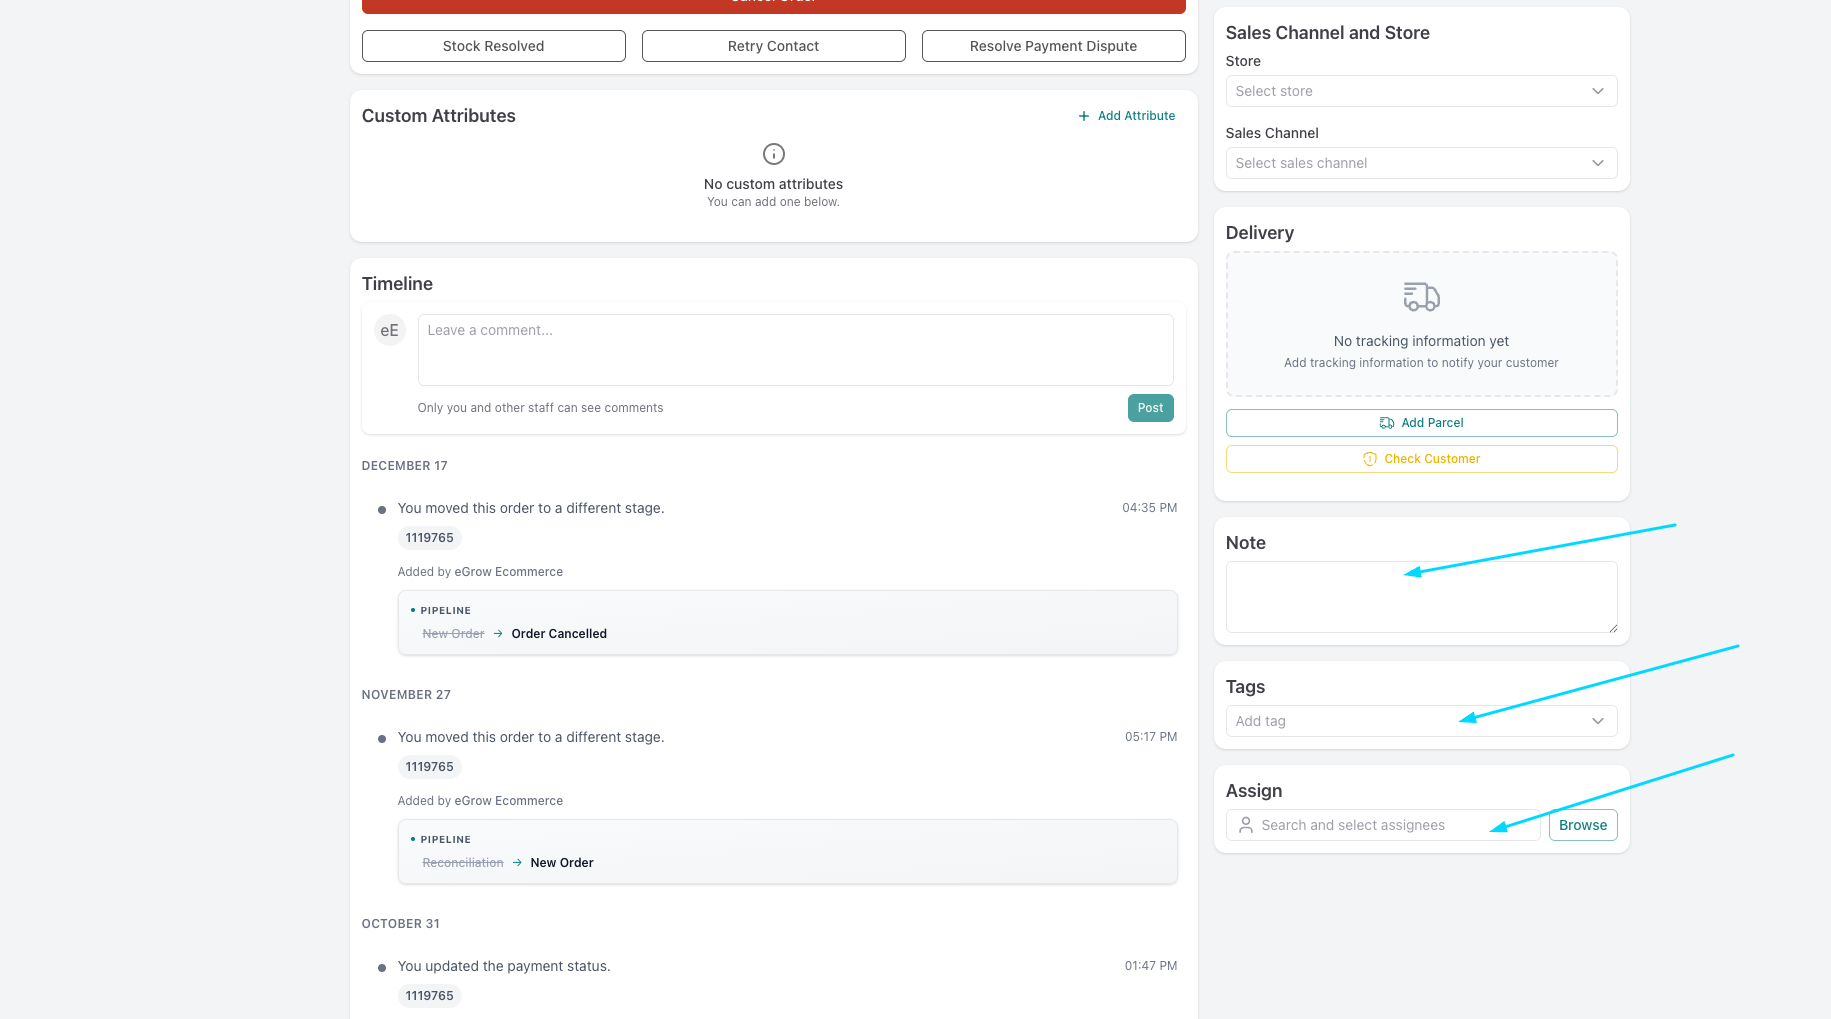
Step 5: Assign Orders to Team Members
If you work with a team, you can assign each order to a specific agent.
This avoids confusion and ensures every order has a responsible person handling it.
Step 6: Add Notes or Tags
You can add internal notes or tags to orders (like “urgent”, “VIP client”, or “cash on delivery”).
This helps your team prioritize and organize orders better.
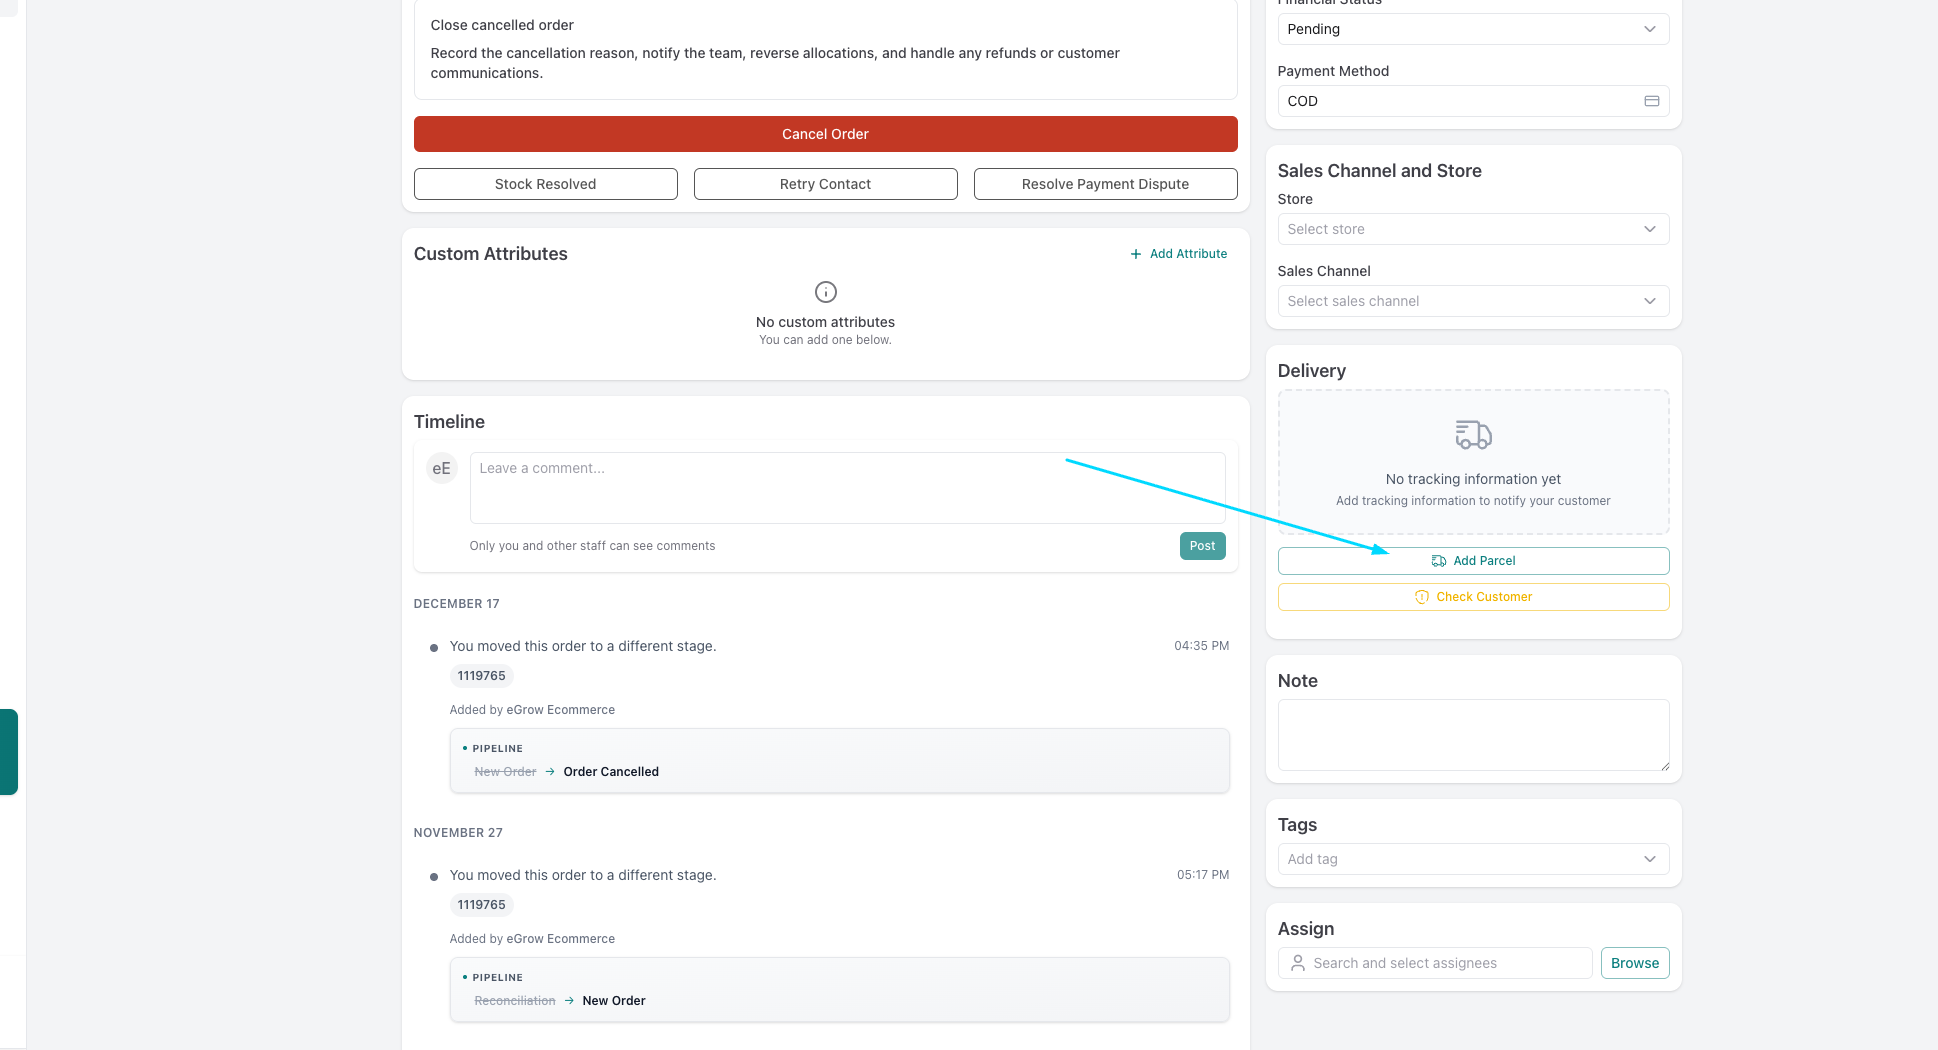
Step 7: Send Orders to the Shipping Company
Once an order is confirmed, you can send the order details to your shipping company directly from eGrow.
This reduces manual work and minimizes mistakes.
Step 8: Track Order Progress in Real Time
As the order moves forward, you can track its progress from the same dashboard.
No need to open WhatsApp or spreadsheets, everything stays updated in one place.
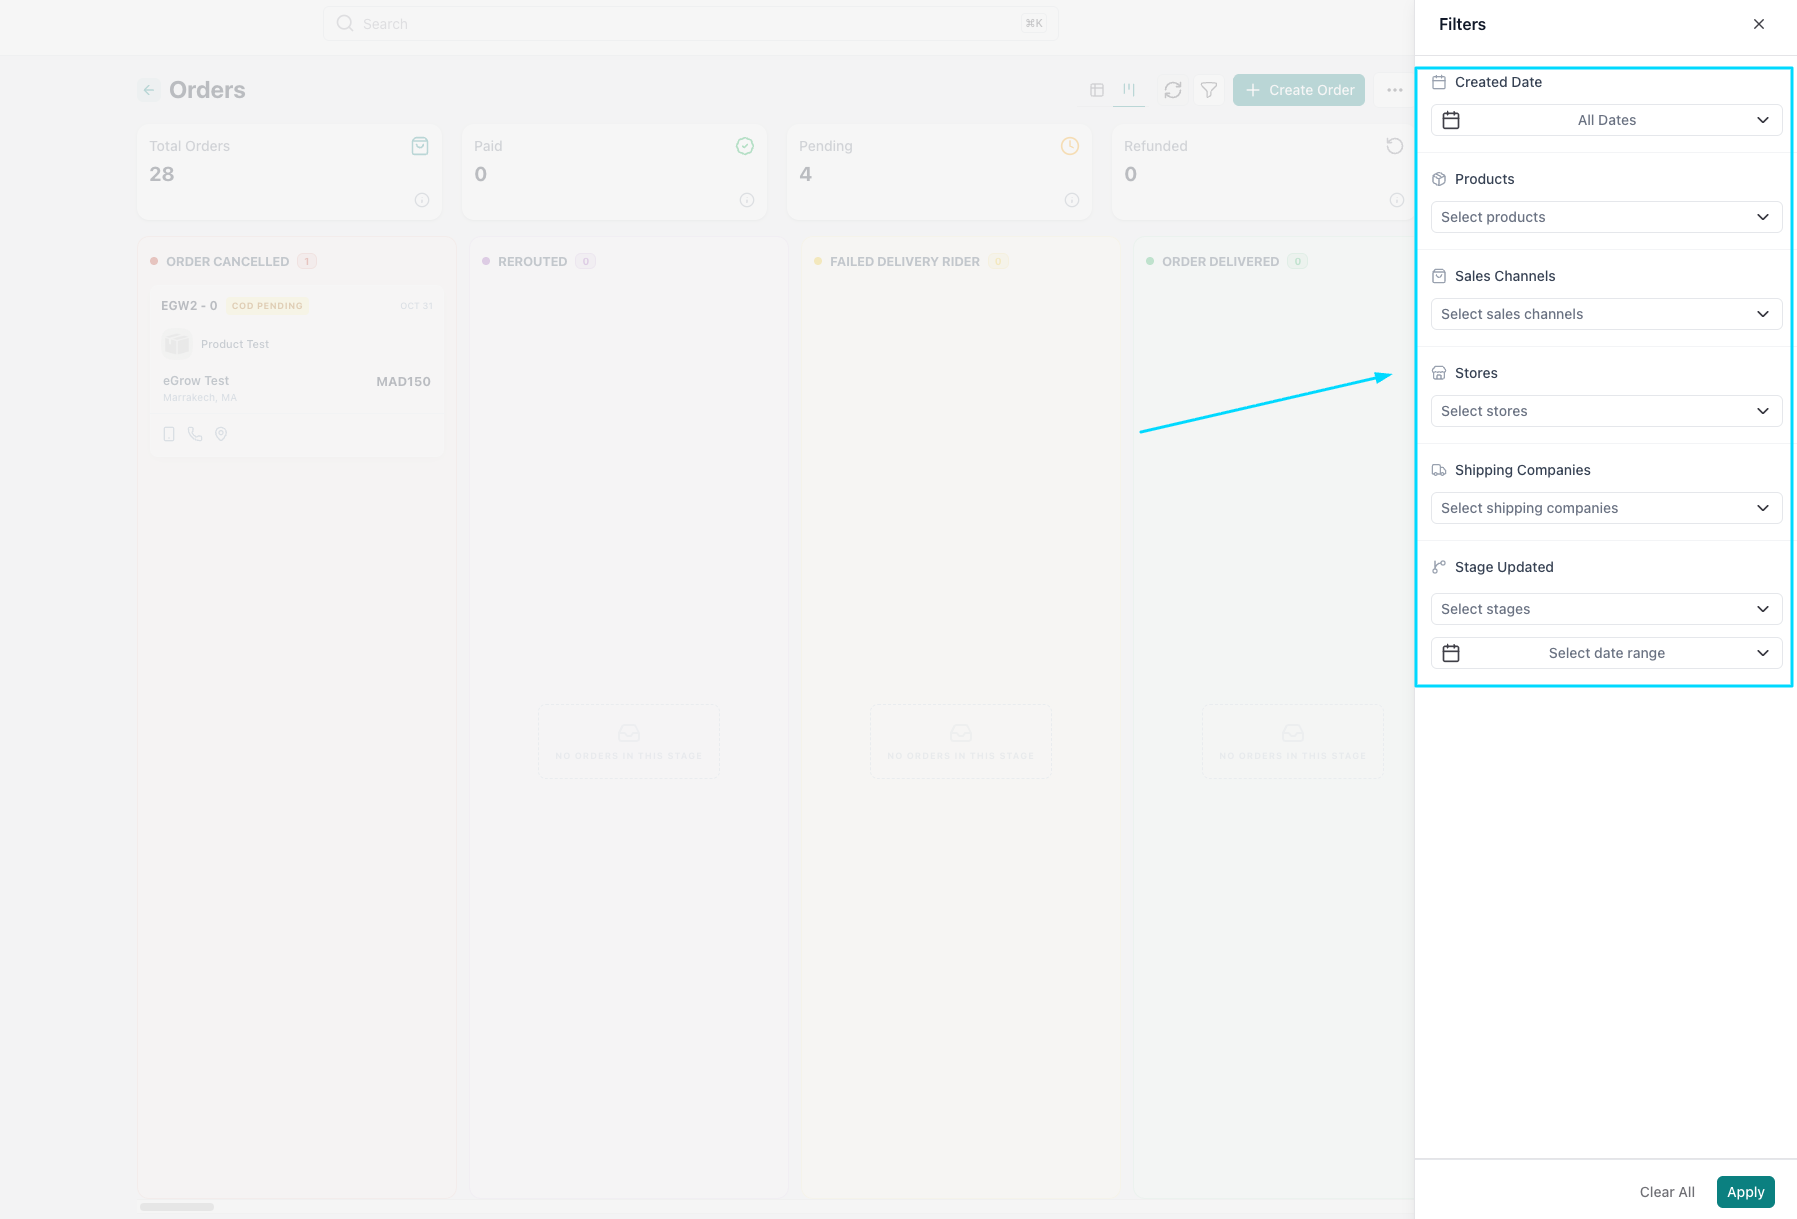
Step 9: Use Filters to Find Orders Faster
Use filters (by date, status, agent, or customer) to quickly find specific orders.
This is very useful when you have many orders per day.

Step 10: Analyze Your Orders
From the dashboard, you can also view basic statistics about your orders.
This helps you understand how many orders you receive, how fast they are processed, and where you can improve.