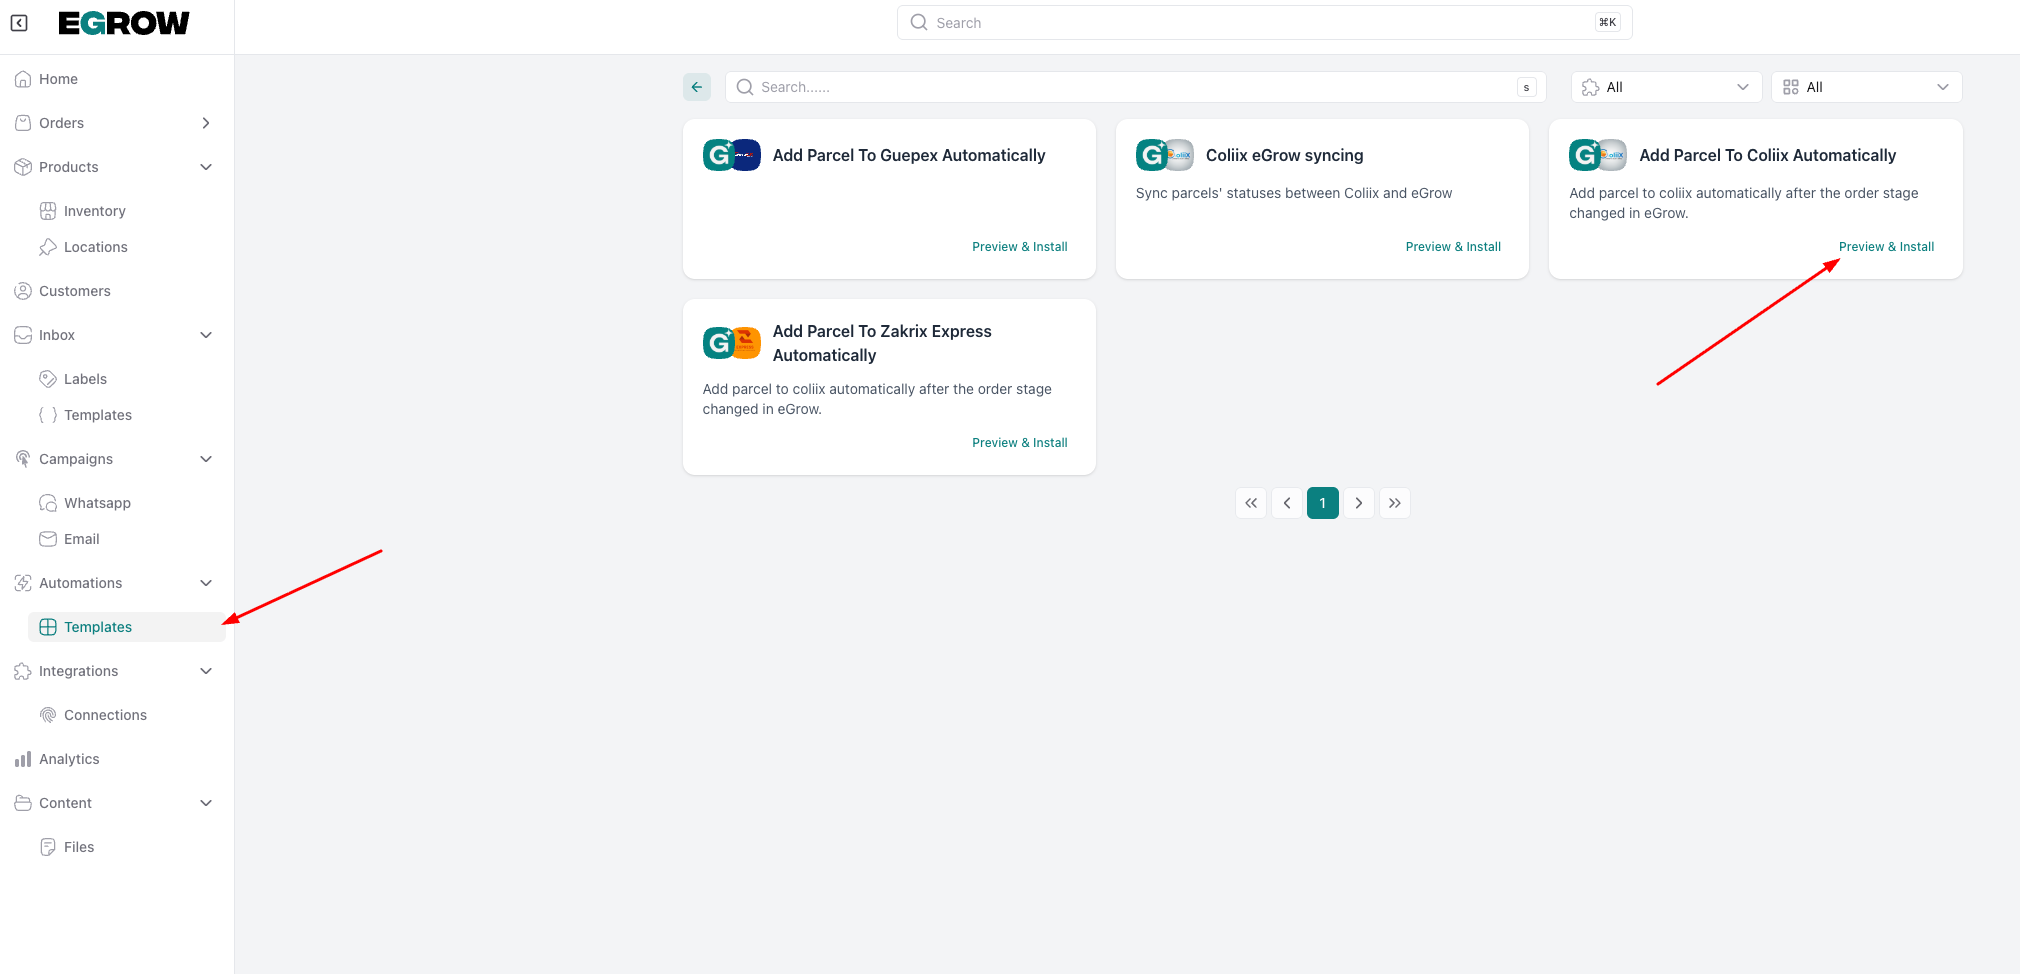
Step 1: Find the Coliix Template
First, we need to locate the ready-made automation in your eGrow dashboard.
Open your eGrow account.
On the left-hand sidebar, click on Automations.
From the dropdown menu, select Templates.
Look for the card titled "Add Parcel To Coliix Automatically."
Click the Preview & Install button.
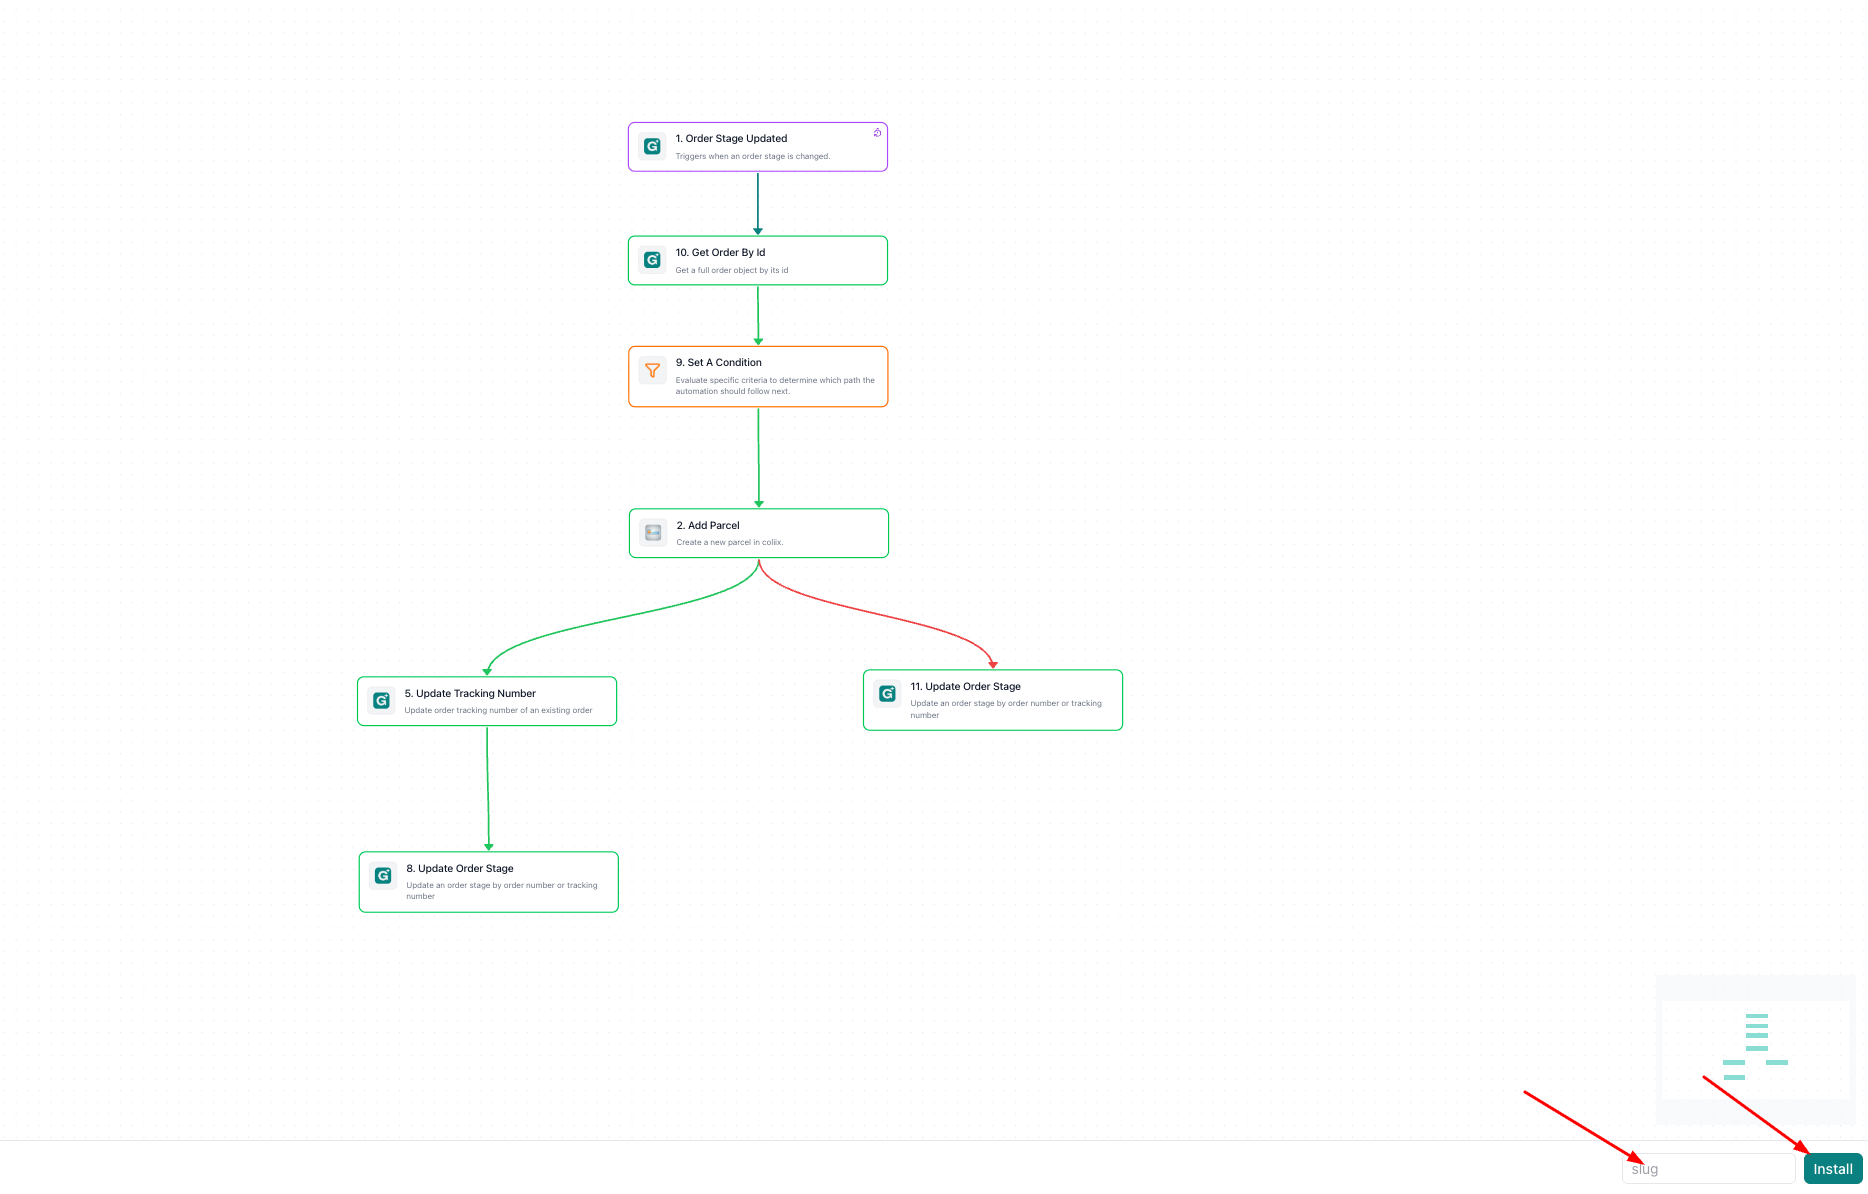
Step 2: Name and Install Your Automation
Once you click preview, you’ll see a visual map (a "workflow") of how the automation works. Don't worry about the technical boxes—the template does the heavy lifting for you!
Look at the bottom right corner of your screen.
In the box labeled Slug, type in a simple name for this automation (for example:
coliix-shipping). This is just a nickname for the system to identify this specific task.Click the teal Install button.
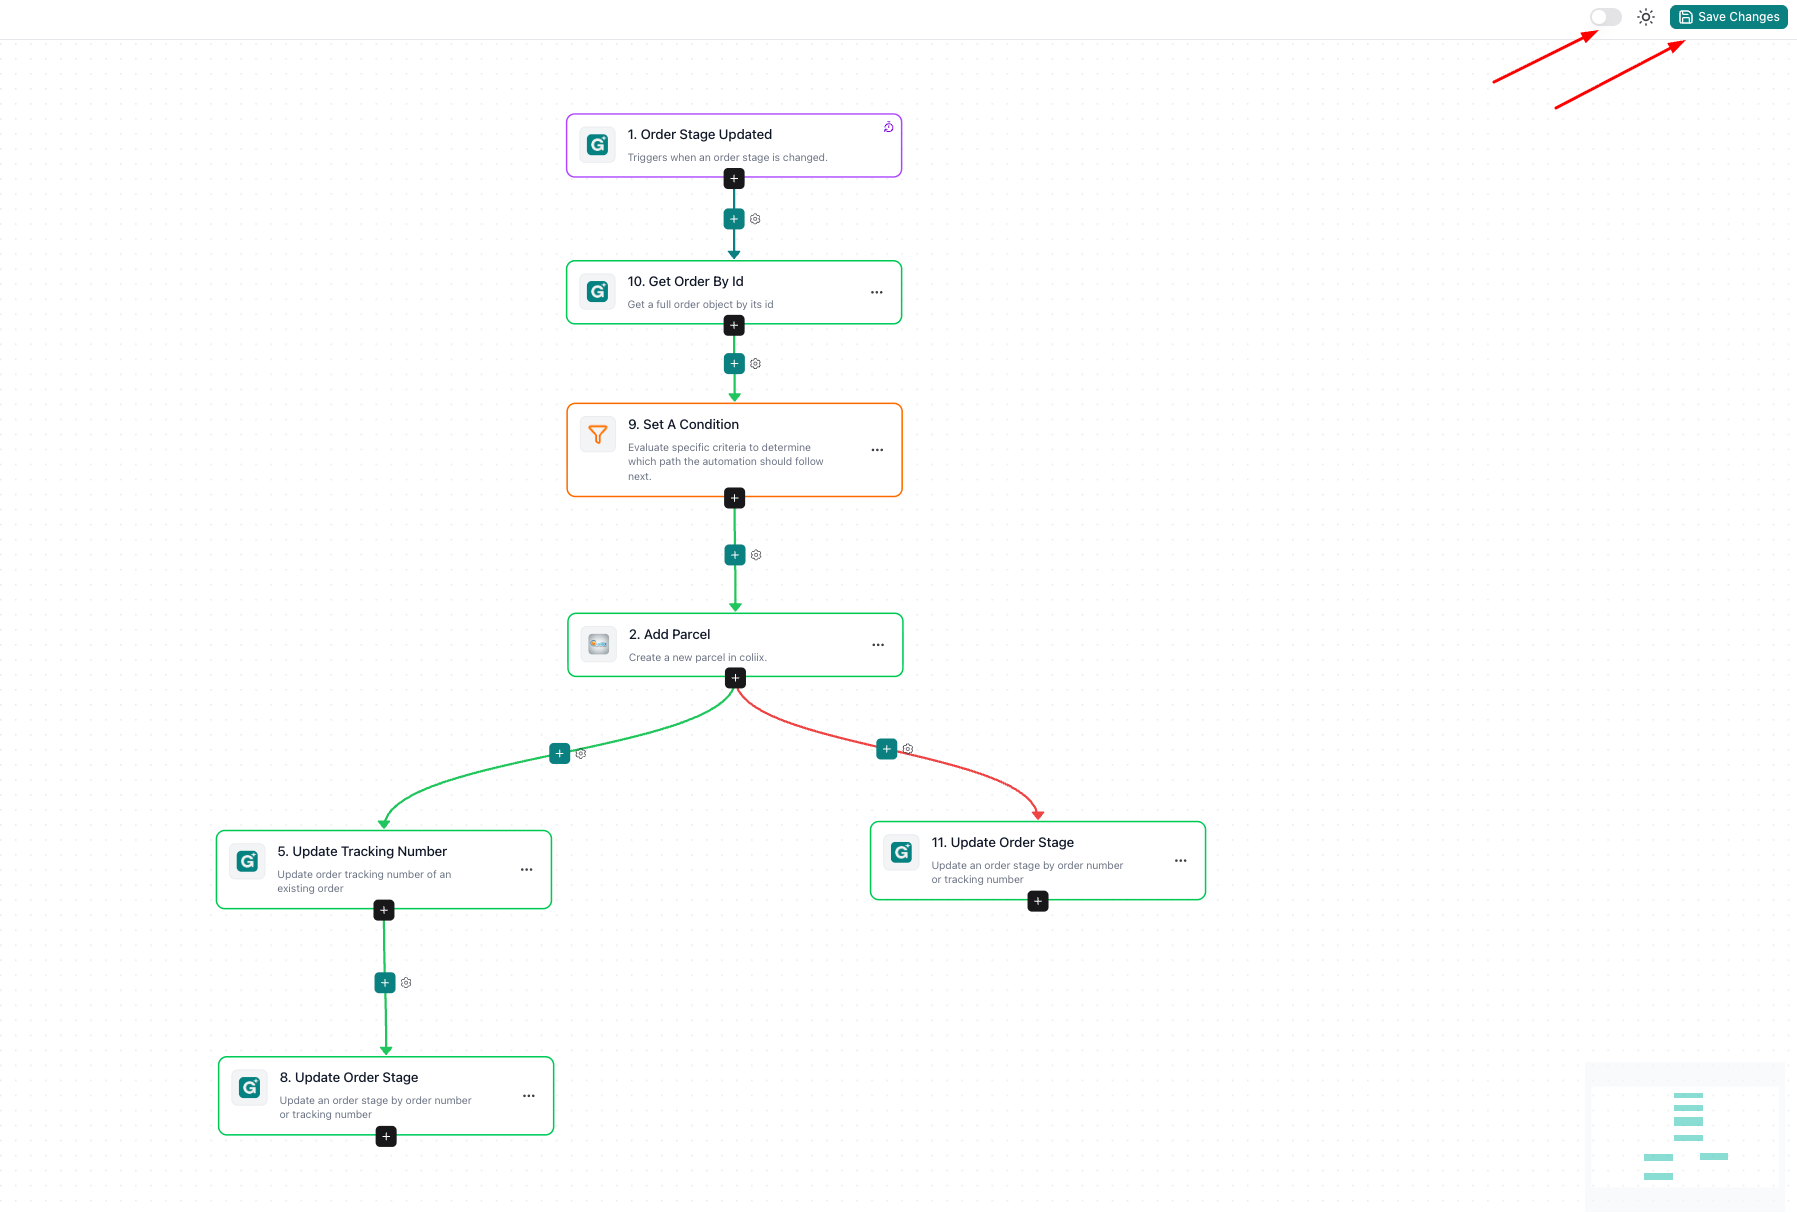
Step 3: Save and Activate
Now that the template is installed, you are in the "Editor" mode. This is where you could make custom changes if you wanted to, but since the template is already set up for Coliix, you're almost finished.
Review the workflow to make sure everything looks correct.
Click the Save Changes button in the top right corner.
You’re all set! Your eGrow account will now automatically communicate with Coliix whenever your order stages are updated.